Easy DIY Wonder Woman Headband and Wrist Cuffs using Felt

Hello everybody!

I hope you guys are well.

Since Halloween is just around the corner here’s a quick DIY costume accessories idea for Wonder Woman.

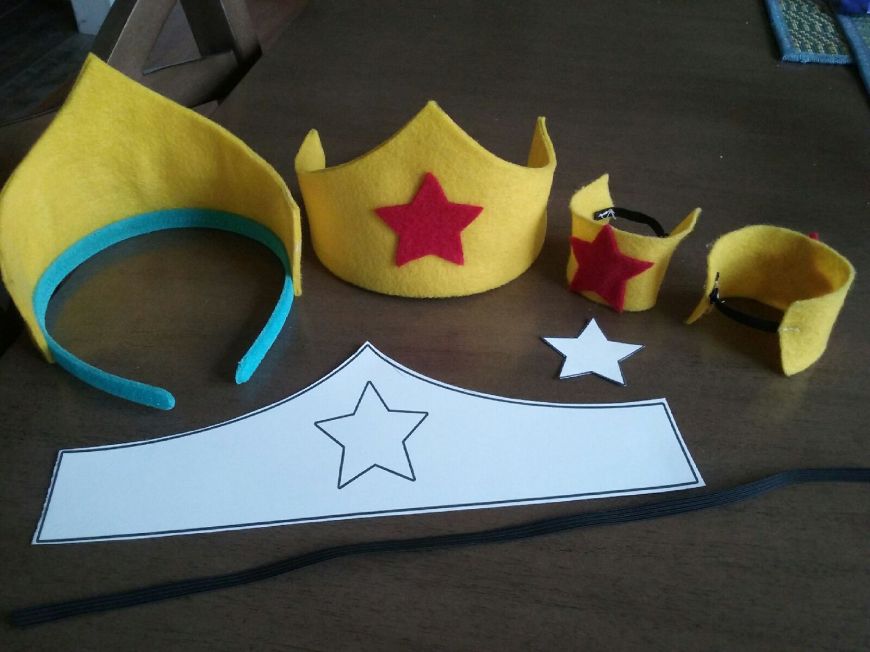
20161026_143526I made these headpieces and wrist cuffs for my daughters who wanted something simple to wear on Superhero day at their school. They wore a plain blue shirt and jeans so the accessories would pop out more.  They didn’t want to do the typical cape and mask thing so I found a good template online for Wonder Woman’s headband and got to work.

Using the template to get the design, I folded the felt in half to make it sturdier with two layers of felt as oppose to just a single layer.  I glued the headpiece at the edges with some tacky glue and then made the stars with a template and red felt.  I then glued the headpiece onto the plain headband.  The tacky glue doesn’t dry instantly so I used large paperclips to secure the felt onto the headband until it dried.  It worked like a charm.  For the wrist cuffs I simply cut out a long rectangular piece from the yellow felt and split it in half.  I then glued the stars in the middle and sewed on a small piece of elastic so they could slide it onto their wrist and have fun pretending to be Wonder Woman, which they did.  

I hope you like this idea!

Take good care all.

Until next time…

DIY Peppa Pig Birthday Banner

Hello everybody!

I hope you guys are well.

My youngest daughter turned 4 years old this past Saturday.  I wish I could have captured on camera how her morning, sleepy face transformed into sheer happiness upon hearing us say, “Happy Birthday Sophia!”  It was magical and so sweet.  I did take a ton of pictures after we got all dressed up, but I have to sort through them first.  For this post, I wanted to share with you how I made her a Peppa Pig birthday banner.

Enjoy!

CAM00734-1text

CAM00738text CAM00739text CAM00750text

This banner was super easy to make and didn’t take long.  I found the banner template online.  I had foam flower cut outs saved from a great find at the dollar section in Target.  I did the happy, birthday, and letter circles myself on Word, then glued everything together and strung it up with pink ribbon.

I absolutely loved how this banner came out and my daughter loved seeing it up on the wall.  The theme was Peppa Pig and she loved seeing all the different pictures of Peppa Pig.

More pictures to come.

Take good care all.

Until next time…

Personalized Paper Bows

Hello everybody!

I hope you guys are well.

I’m officially obsessed with this paper bow template (http://howaboutorange.blogspot.com/2013/04/how-to-make-paper-bow.html) and that’s okay with me.  I’m going to my niece and nephew’s birthday party and I wanted to personalize their gift bows.  It takes a little time, but the end result is wonderful, at least in my opinion!

IMG_6153text

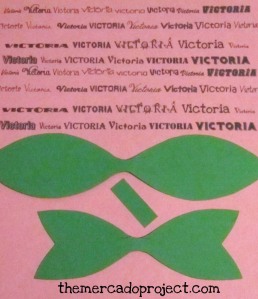
I used construction paper for the first bow and printed out the name in various fonts on Word.

IMG_6156text

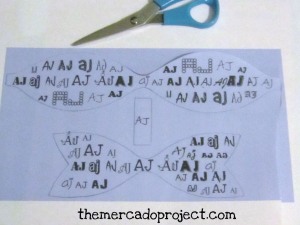
For the second bow, I scanned the template and uploaded it on Word, then changed the color and inserted the name, here and there in various fonts as well.

IMG_6157text

IMG_6160text

I love these personalized bows and can’t wait to make and use them for my Christmas presents.

Take good care all.

Until next time…

DIY felt Goomba, Bullet Bill, and Mario Star

Hello everybody!

I hope you guys are well.

My daughters absolutely LOVE Super Mario and friends.  They’re always looking at videos on YouTube and love seeing the cartoon on Netflix.  Two weeks ago my oldest found a tutorial video on how to make your own Super Mario star using felt.  Inspired by that video, my husband and I decided to make a couple of star buddies for our daughters.

IMG_5481text

Fortunately, I already had a foam star from my daughter’s birthday decorations, which became a perfect template.  I traced four stars, front and back, on yellow felt with a disappearing ink pen (found in the sewing aisle at the craft store).  I cut those out along with four little rectangles using black felt for the eyes.  That was my job.  The sewing part went to my husband who’s better at sewing.  We used cotton balls for the stuffing since we didn’t have anything else.  Once the stars were done and presented, the squeals that ensued were proof enough that they came out great.

Then my daughter declared that she was going to make Bullet Bill.  She told me that she needed black, red, and purple felt.  And tape!  Those aren’t exactly the colors of Bullet Bill, but I indulged her anyway.  With her scissors she got to work and asked me if I could cut out two big circles from the red felt and two smaller circles from the purple felt.  These circles were going to be the eyes.  She tried her very best and taped something up that was supposed to look like Bullet Bill, but wasn’t quite holding up since she used tape.  My husband soon stepped in and improvised with what we had in hand (supplies were running low).  Without a template, just a picture of Bullet Bill and their creativity, a felt buddy/villain was created.

But that wasn’t the end.  Oh no, another request, and a trip to the craft store (cotton balls finished), was made several days later.  Why stop now?  Let’s make one more.  Let’s make Goomba!  Again, with the help of a picture of this little villain as well as a sketch template of the body, which my husband did, they got to work and had a lot of fun seeing this little guy come to life, especially with its new stuffing (we purchased a 12 oz. bag of Poly-Fil 100 percent Polyester Fiberfill).

IMG_5467text

Here are the newest additions (missing a star) to my daughter’s plush Super Mario and friends toys.  They absolutely love these guys.  As you can see my husband added some red and pink felt streamers to Bullet Bill (not part of the original picture, but creative).

I know more characters are going to be requested and we’re going to do our best in bringing them to plush life because it’s a lot of fun.

Take good care all.

Until next time…
DIY PAPER BOWS

Hello everybody!  I hope you guys are well.

I absolutely love making my own paper bows so when I came across this wonderful DIY tutorial at http://www.howaboutorange.blogspot.com/2013/04/how-to-make-paper-bow.html I knew that I would be sharing it with you immediately.  It’s that awesome for all you crafters out there.

IMG_4554text

There’s a free PDF template at the link posted above.  I used several colorful cardstock papers to make my bows, but of course you can always use regular paper or simply print out the template on cardstock, because it’s sturdier, and trace onto any other paper like newspaper, magazine pages, scrapbook paper, etc.  The possibilities are endless and here’s a great idea for a one of a kind paper bow: print the template on regular paper, have your child design it (color it in), cut and put it together. They’ll be smiles all around!

IMG_4557text

Paper cutting frenzy

IMG_4558text  IMG_4556text  IMG_4559text

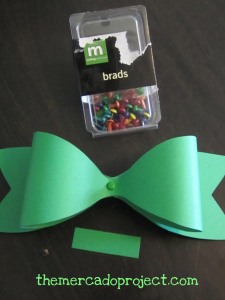
I decided to use brads at the center to hold my bows together.  Then I wrapped and glued the final piece.

IMG_4560text

I literally squealed with delight.

This project and its end result made me really happy.

I love these bows and can’t wait to make more.  Many, many more!

THANKS to Jessica Jones at http://www.howaboutorange.blogspot.com/ for creating this template and offering it to everyone.  I’m a new fan and follower!

Take good care all.

Until next time…