Easy DIY Wonder Woman Headband and Wrist Cuffs using Felt

Hello everybody!

I hope you guys are well.

Since Halloween is just around the corner here’s a quick DIY costume accessories idea for Wonder Woman.

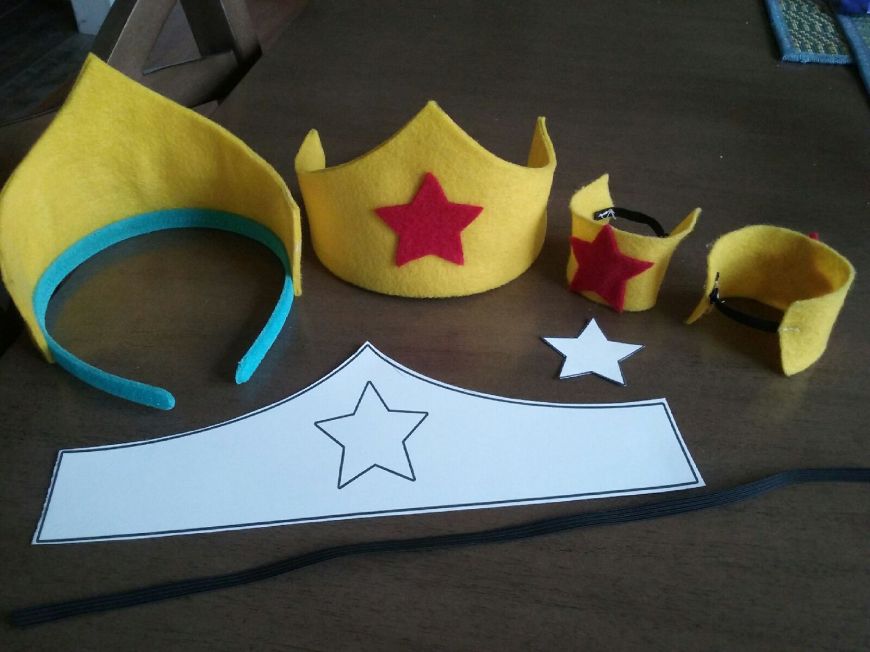
20161026_143526I made these headpieces and wrist cuffs for my daughters who wanted something simple to wear on Superhero day at their school. They wore a plain blue shirt and jeans so the accessories would pop out more.  They didn’t want to do the typical cape and mask thing so I found a good template online for Wonder Woman’s headband and got to work.

Using the template to get the design, I folded the felt in half to make it sturdier with two layers of felt as oppose to just a single layer.  I glued the headpiece at the edges with some tacky glue and then made the stars with a template and red felt.  I then glued the headpiece onto the plain headband.  The tacky glue doesn’t dry instantly so I used large paperclips to secure the felt onto the headband until it dried.  It worked like a charm.  For the wrist cuffs I simply cut out a long rectangular piece from the yellow felt and split it in half.  I then glued the stars in the middle and sewed on a small piece of elastic so they could slide it onto their wrist and have fun pretending to be Wonder Woman, which they did.  

I hope you like this idea!

Take good care all.

Until next time…

Happy Valentine’s Day!

Hello everybody!

I hope you guys are well.

Valentine’s Day is fast approaching and at my daughter’s school they did something pretty cool this year.  They wanted their students to decorate and bring in a valentine holder for their valentine cards and treats.

My kindergartener and I decided to decorate an empty graze snack box (graze.com) because it was already partially decorated for Valentine’s Day (red hearts) and it was the perfect size to transform into a purse/clutch valentine holder! 🙂

We just added my daughter’s name in the front (covering the graze name) along with some 3D valentine stickers
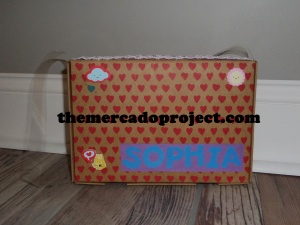
and glued a piece of purple construction paper in the back and decorated it with a variety of stickers.
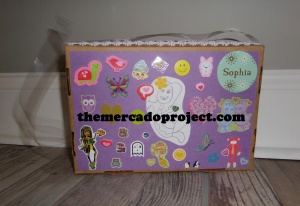
Back

I secured the box with a little bit of clear tape and made a slot, which we decorated with a fabric, flower ribbon, for the valentine cards and treats to go in.
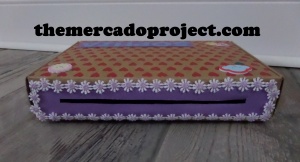
We recycled the clear plastic backing, which you can probably see in the first 2 pics, of the glitter tape decoration that we placed around the box (not shown in the pics) for the purse strap.  I then showed my daughter how she could hold the box two ways:  as a clutch with her hand or a shoulder purse with the strap.  The giddiness that ensued after transforming that box into her valentine holder will stay with me forever. 🙂

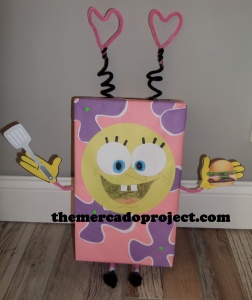
As for my third grader, she had a vision and it involved one of her favorite cartoon characters, SpongeBob Squarepants.  She loves that little dude!

She didn’t want to do plain, old SpongeBob though.  No, she wanted to make SpongeBob in his Kuddly Krab work uniform.   This uniform is featured in the episode titled “Bossy Boots.”

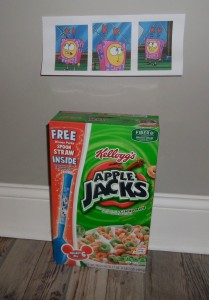
We printed out some pics of SpongeBob wearing the uniform so we could easily reference it.
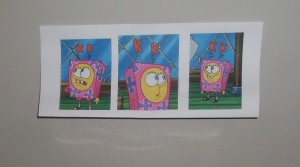
I also made a template of the purple flower design that’s on the uniform so my daughter could easily trace, cut, and glue the design onto the box.

The materials we used were a cereal box, construction paper (pink, yellow, purple, white, and neon green card stock paper), and pipe cleaners.  We also printed out a small spatula and a “Krabby Patty,” which we taped onto his hands.
        

From a cereal box to “Kuddly Krab SpongeBob Squarepants!”
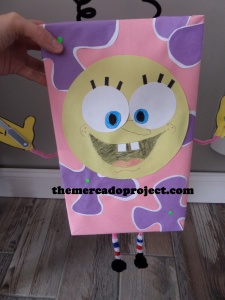
           

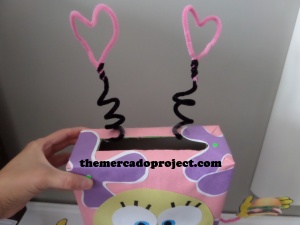
Here’s the breakdown: We gift wrapped the box with pink construction paper using tape and glue.  My daughter traced a big circle out of yellow construction paper for his face and two small circles for his eyes with white paper as well as two little squares for his front teeth.  She then drew the details herself.  She used the template for the purple flower designs and we glued those down as well as his face.  The pipe cleaners were used to make the antennas, arms, legs, socks, and shoes.  She wanted to place two pink hearts on the antennas instead of the red K’s.  For his yellow hands I copy and pasted a picture of SpongeBob and cropped the pic until his hands were the only things on the screen, then printed and glued onto the pipe cleaner.  We did the image two sided so it was easier to glue.  A slot at the top of the box ensures that valentine cards and treats will go in nicely!

There you have it!

HAPPY VALENTINE’S DAY EVERYONE!

Take good care all.

Until next time…
Egg-celent Day!

Hello everybody!  I hope you guys are well.

Today was the first day of my daughter’s Spring Recess and to kick it off, I decided to dye our first eggs at home.  Yes, it’s another egg story.  🙂 I took their yellow Little Tikes table to the kitchen because it’s the brightest room in the house plus the cleaning supplies are there too, just kidding, not really.  Yesterday, we purchased this kit at Target.

IMG_4180text

I chose the Marble Magic effect.  Inside you’ll find an egg dipper and color tablets.  Instructions are on the back of the box.

IMG_4181text         IMG_4182text

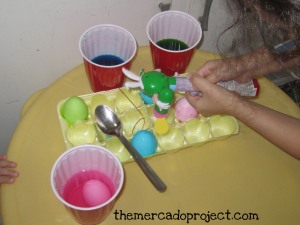
I chose to add vinegar to the tablets for a more vibrant color per the instructions.  I hard-boiled four of the eggs.  The other two were emptied out by my husband the day before.  I dissolved the tablets and got green, blue, and pink.  Then I added ½ cup of water to each.

IMG_4184text          IMG_4186text

We dipped the eggs and my oldest daughter decided to use her M & M’s toy fan to speed up the drying process while my youngest was fascinated and kept looking into the cup.  I had to watch her closely in case she decided to take a sip.

IMG_4193text     IMG_4194text

We dipped some of the eggs into two colors and achieved somewhat of a marble effect.  It looks more speckled to me, but the girls were happy with the results and that’s all that matters.  The Peter Rabbit egg holders were very handy.  Aren’t they adorable?

IMG_4196text

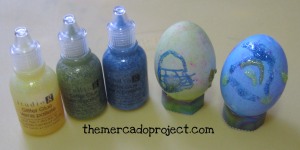
Olivia took her markers and got even more creative.  It’s a girl holding a basket with an egg.  Love it!

IMG_4205text

She also used glitter glue to decorate the eggs.

IMG_4211text        IMG_4213text

Here’s the Peter Rabbit basket made out of cardstock.  It was super easy to make and absolutely adorable.  I glued the characters to the basket, but used masking tape for the basket itself.  If you want to make one for your kiddo click here http://www.nickjr.com/crafts/peter-rabbit-egg-basket.jhtml

I had a lot of fun dyeing these eggs with my daughters and we’re going to be making more because my husband was working today and missed out.  We Skyped him at his job, once we finished, so he could see the results and he was super happy to see us and our marbled/speckled eggs.  This will be my last post on eggs, I promise.  I do hope you guys enjoyed our adventure in egg land.

Take good care all.

Until next time…

Germ City and a couple of Iron On transfers

Hello everyone!  I hope you guys are well.

As for me, I’ve been to Germ City and back.  I got sick again.  Can you believe it?  Back to back.  I don’t even think I was finished being sick the first time before the second wave hit.  It started with an itchy throat and then BAM!, my body and my head just wanted to curl up in bed and forget about the world, but I couldn’t do that because I have to take my oldest daughter to school in the morning and take care of my two-year old at home.  I will admit to you all that it brought me to tears.  Not having control of my body or the energy to fulfill my obligations as a mother really sucks.  In one moment, my two-year old looked at me and said, “Its ok.”  I love that little girl.  I’m feeling much better now with the help of my wonderful husband (he took over when he came home from work and got me meds!) and my landlady/friend (she made us soup and looked after my youngest daughter while I took my oldest to school).  My body is up and running again so enough about being sick.

Let’s talk about Iron-On transfers!  Last week, I wanted to design a bag for my mother’s upcoming birthday.  I also wanted to make my daughter a t-shirt with her latest obsession, Super Mario and friends.  I found a cool clip art on AOL search, printed it out on iron on transfer paper and ironed it on a white youth t-shirt.  I surprised her with the shirt and she absolutely loved it!

IMG_4037text

I have to do another one for my youngest because she wasn’t happy with the fact that I didn’t make her one.  Oops!

IMG_4039text

For my mother’s bag I took a couple of pictures of her with my daughters as well as one with them striking a princess pose, printed and ironed it onto the bag, which I bought at A.C. Moore.  These bags are awesome.  I’m going to stock up on them.  I think my mom is going to love this bag!

Let your creativity soar and make one-of-a-kind gifts for your loved ones!

Take good care all.

Until next time…

DIY Felt Gift Bow

Hello everybody!  I hope you guys are well.  I love wrapping gifts with unique wrapping paper that I either make myself, if the gift is small enough, or find at stores.  Recently, I wrapped up this gift for my god-daughter’s birthday.

IMG_3841text

I found this polka dot wrapping paper in the dollar section at Target in Harrisburg, PA awhile back.  My god-daughter loves Minnie Mouse so I found this clip art and glued it on top and then I found a Disney inspired font and printed out her name on an address label for her card.

She’s going to love it!

I also love gift bows and after finding that DIY magazine gift bow pin on Pinterest and attempting it with great results, I thought, “Let’s try using something else to make a bow.”  HELLO FELT!  

IMG_3928text

IMG_3929text

IMG_3930text

IMG_3932text

IMG_3933text

IMG_3934text

IMG_3935text

IMG_3936text

IMG_3941text

I’m definitely not a pro at sewing, but I do my best.  I love the final result of this bow and I used a long piece of thread so I could attach all the felt pieces together without having to cut and start again.  I only cut the thread for the last piece of felt, in which I sewed it separately and then tried to sew it on top of the bow without showing too much thread.  I wasn’t that successful, but that was my first attempt and I’m definitely making more of these bows so hopefully practice makes perfect.  I’m going to add a little bit of glue so it’ll stay on the gift, but hopefully still come off intact.  The gift above is my husband’s Valentine’s Day gift 🙂 wrapped up in another gorgeous print found at Target’s dollar section.  I can’t wait to show you what I got him.  It’s too freaking cute!  I also can’t wait to do more of these gift bows in different felt colors and designs.  Happy gift wrapping and bow making!

Take good care all.

Until next time…

DIY Thanksgiving banner

Hello everybody!  I hope you guys are well.  Here’s a DIY Thanksgiving banner that I came up with.

I used Microsoft Word, a leaf template, cardstock, a wide Thanksgiving print ribbon, and paper clips to make my banner.

A simple, but meaningful banner.

I affixed the leaves onto the ribbon using the paper clips and the ribbon is held by blue painter’s tape, which I love to use because it holds things up and doesn’t damage surfaces.  I hope you like this idea.

Stay alert, stay alive.

Until next time…

DIY DOOR MONSTER DECORATION FOR HALLOWEEN

Hi everybody! I hope you guys are well.  I had a great surprise for my daughters yesterday.  While my oldest was at school and my youngest was taking her nap, I had time to decorate the door in our living room for Halloween.

Inspired by a pin on www.pinterest.com,

I made our own door monster.

I know he’s supposed to be scary, but I think he’s adorable.  I used blue and white party streamers for the hair, eyebrows and mouth, two disposable plates and a sharpie marker for the eyes, and tape to hold everything up.  I might add some red to our monster so he can be a Giants fan just like us!

When my daughters saw this, my oldest couldn’t stop smiling and my youngest, who’s such a character already at just 2 years old, turned around and ran screaming.  She was pretending to be scared! 🙂 She came back smiling and couldn’t stop looking at the door.  This was a quick, easy and fun decoration to do.

This morning, as my youngest was staring at the door again, I told her  “We should give him a name.”

She replied, “Monster.”

Good enough for me!

Take care all.  Until next time…

DIY PAPER HEART GARLAND

Hello everybody!  I hope you guys are well.  I wanted to show you another pin from, you guess it, www.pinterest.com, in which I used to make a paper heart garland as part of my anniversary centerpieces.  I absolutely loved this paper idea and I knew I was going to incorporate it one way or another.  Plus I had fun doing this project.

Pin with instructions (Thank you to the creator of this)

My version using turquoise and gold speckled cardstock. I used my Cricut paper trimmer and a paper clip to close the hearts into a circle.

              I made 9 hearts in turquoise and 2 in gold, symbolizing a total of 11 years happily married and the 2 gold hearts for my daughters. 🙂

Take care all.  Until next time…

DIY fabric covered wooden letters

Hello everybody! I hope you guys are well.  I wanted to share with you my second project that I did this past Friday.

I’ve had this letter A and this pink toile fabric for a long time now.  I love this fabric so much that I decided to use it to decorate the letter A, which is my first initial.  I’ve never done this project before so I just did it my way and took pictures highlighting each step that I thought was helpful.  Basically, it’s like wrapping a present and using glue instead of tape.

Here’s what I did:

Using a ruler I outlined the letter (I didn’t trace it) on the front of the fabric because I needed more fabric for the sides and I wanted to see exactly what part was going to show.  I also used a vanishing marker.

I used my rotary cutter and mat.

This time I traced the letter on the other side of the fabric so I could know exactly where to place it down once I applied the glue to the letter.

I glued the letter down and these were my tools.  I used my x-acto knife, sharp scissors, a ruler (borrowed from my daughter :)), vanishing marker, glue, and a Q-tip (the top of my glue was broken so I used a Q-tip to apply the glue onto the front and sides of the letter).

Using my ruler, I started marking where I would cut and glue the fabric.  The process was like wrapping a gift.

As you can see in the pic above I lost some of the fabric due to the curve of the letter A so I just took a small piece of fabric and glued it onto the spot and then covered the side with the rest of the fabric already there.

Working my way around…progress.

For the little hole in the letter A, I used my x-acto knife and made a cut in the form of a cross all the way to the edge and glued the fabric.  At the bottom of the A, I used my sharp scissors and made cuts at the corners and glued the fabric as neatly as I could.  As you can see, there are some parts that are not covered.

Just take a scrap piece of fabric, make sure that it covers the area well and glue it on.  Now you’re covered!

Same process and…

…I’m done!  I love, love, love my fabric covered wooden letter.  After taking this picture so you guys can see it,  I placed it on my dresser and it looks fabulous.  I’m so happy with the result.  Now, I have a great gift idea and more arts and crafts to do for the future. 🙂

I hope you like this crafty idea.

Take care all.  Until next time…

A set of keys

Hello everybody!  I hope you guys are well.  Yesterday I decided to do some arts and crafts.  It’s been awhile and I was simply in the mood, plus my daughter was taking her nap.  It doesn’t get any better than that, unless you’re taking a nap as well, but I was never good at that so crafting it is.  My first project involved a set of brass decorative keys and paint.  I have been wanting to do this for a long time now so what better time than the present.

Here’s what I did:

I purchased this lovely set of keys from a catalog, Terry’s Village, a long time ago.  You can check out their website for great, inexpensive home decor at terrysvillage.com.

Got my paint and brush ready.  I chose a baby blue, but I’ve had this bottle for a while now so I was scared that the paint inside was bad, but a good shake revealed that all was good.

I wanted some of the brass to show so I didn’t paint the key completely.  I let each key dry and then I painted the ring that held them together.

I love my new set of keys.  I love the blue shade and the brass gives it an antique look.  The painting process was actually quite calming, especially when there’s a two-year old napping away peacefully.  🙂

Take care all.  Until next time…