Easy DIY Wonder Woman Headband and Wrist Cuffs using Felt

Hello everybody!

I hope you guys are well.

Since Halloween is just around the corner here’s a quick DIY costume accessories idea for Wonder Woman.

20161026_143526I made these headpieces and wrist cuffs for my daughters who wanted something simple to wear on Superhero day at their school. They wore a plain blue shirt and jeans so the accessories would pop out more.  They didn’t want to do the typical cape and mask thing so I found a good template online for Wonder Woman’s headband and got to work.

Using the template to get the design, I folded the felt in half to make it sturdier with two layers of felt as oppose to just a single layer.  I glued the headpiece at the edges with some tacky glue and then made the stars with a template and red felt.  I then glued the headpiece onto the plain headband.  The tacky glue doesn’t dry instantly so I used large paperclips to secure the felt onto the headband until it dried.  It worked like a charm.  For the wrist cuffs I simply cut out a long rectangular piece from the yellow felt and split it in half.  I then glued the stars in the middle and sewed on a small piece of elastic so they could slide it onto their wrist and have fun pretending to be Wonder Woman, which they did.  

I hope you like this idea!

Take good care all.

Until next time…

Crazy Hair Day

Hello everybody!

I hope you guys are well.

Last week we celebrated all things great of Dr. Seuss with book readings, poems, and special activities that included wearing a hat to school (crazy or favorite), Dr. Seuss colors (black, white, and red), pajamas, and our favorite, crazy hair.  Of course, my daughters were super excited, especially my young one because it was going to be her very first crazy hair day at school.

I wanted to do something special, but keep things simple at the same time.  This is what we came up with:

crazy hair day 2                crazy hair day 1

We decided to turn a hair bun into a birdie’s nest by taking brown, tan, and green pipe cleaners and twisting them around the bun so they could look like twigs and leaves.  Then we stuck several feathers in and last but definitely not least, the main attraction was these little paper birdies that we found at AC Moore craft store.  It was easy to attach the birds onto the bun because the birds already had a metal hair clip.

Of course, these buns can be decorated more and taken to another level, but like I said before, I wanted to keep things simple.  My girls were super happy with the results (mission accomplish!) and ready to participate in crazy hair day.

Take this idea and let your imagination and creativity fly!

Take good care all.

Until next time…

Happy Valentine’s Day!

Hello everybody!

I hope you guys are well.

Valentine’s Day is fast approaching and at my daughter’s school they did something pretty cool this year.  They wanted their students to decorate and bring in a valentine holder for their valentine cards and treats.

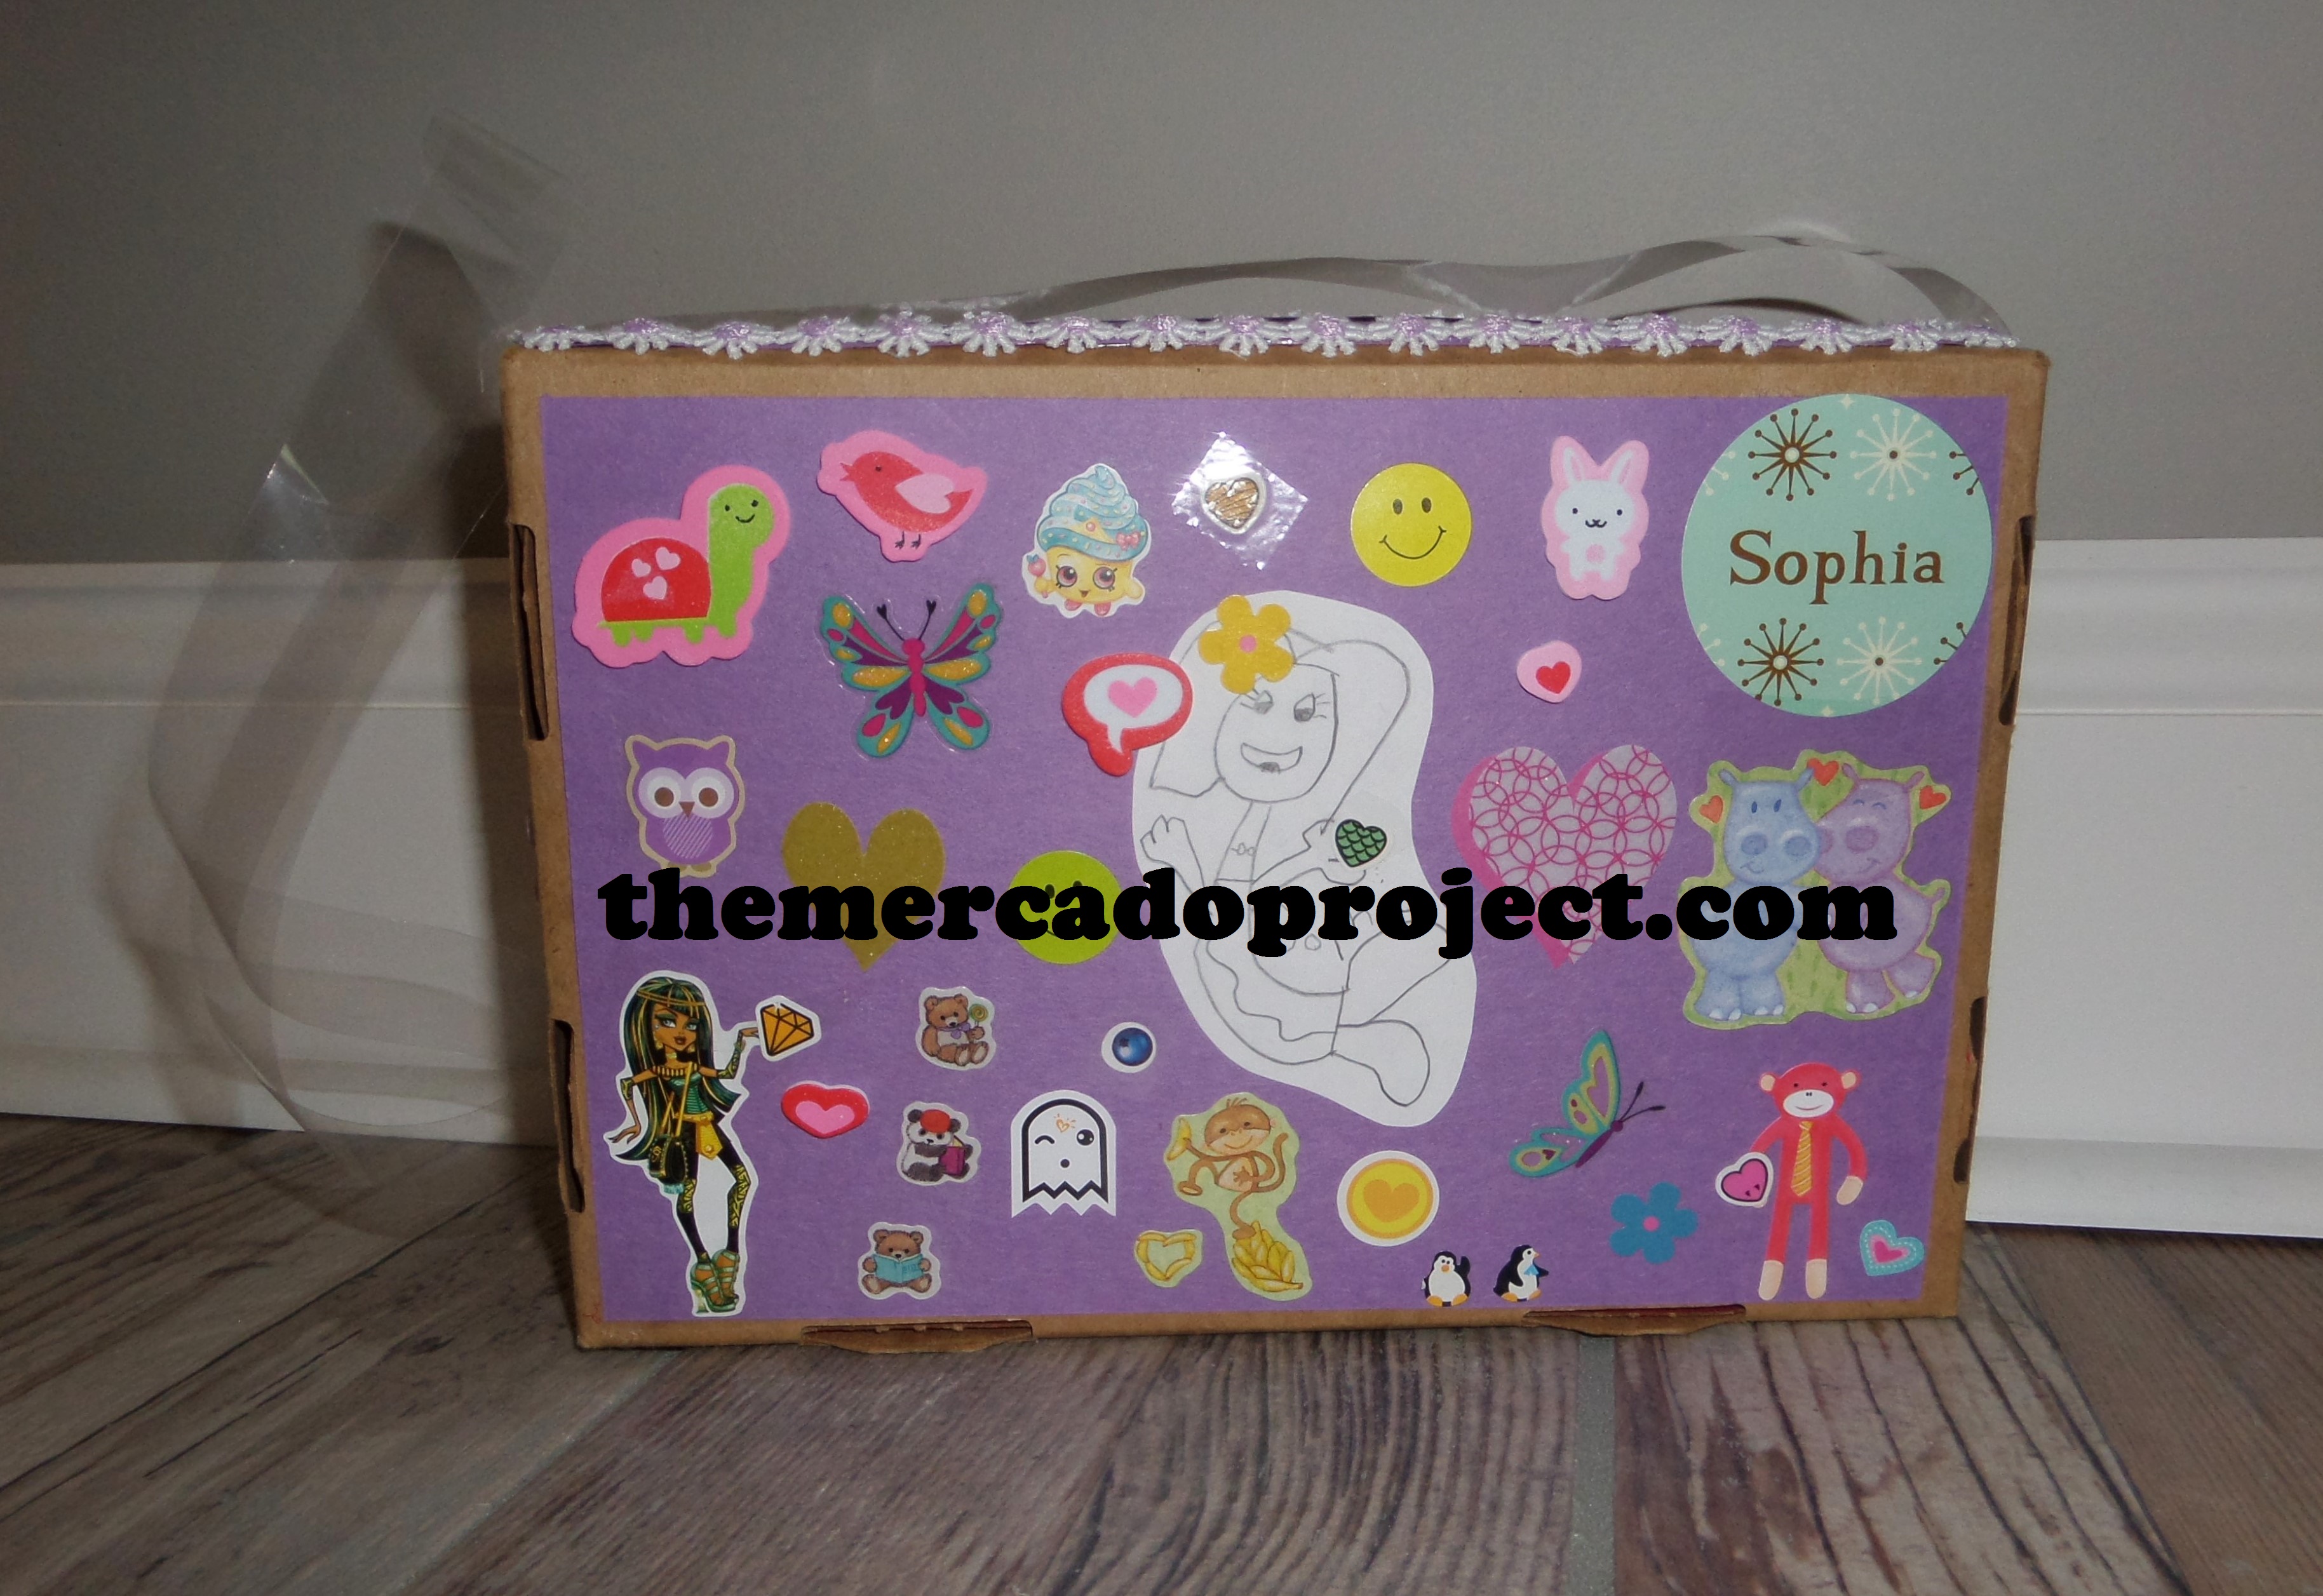
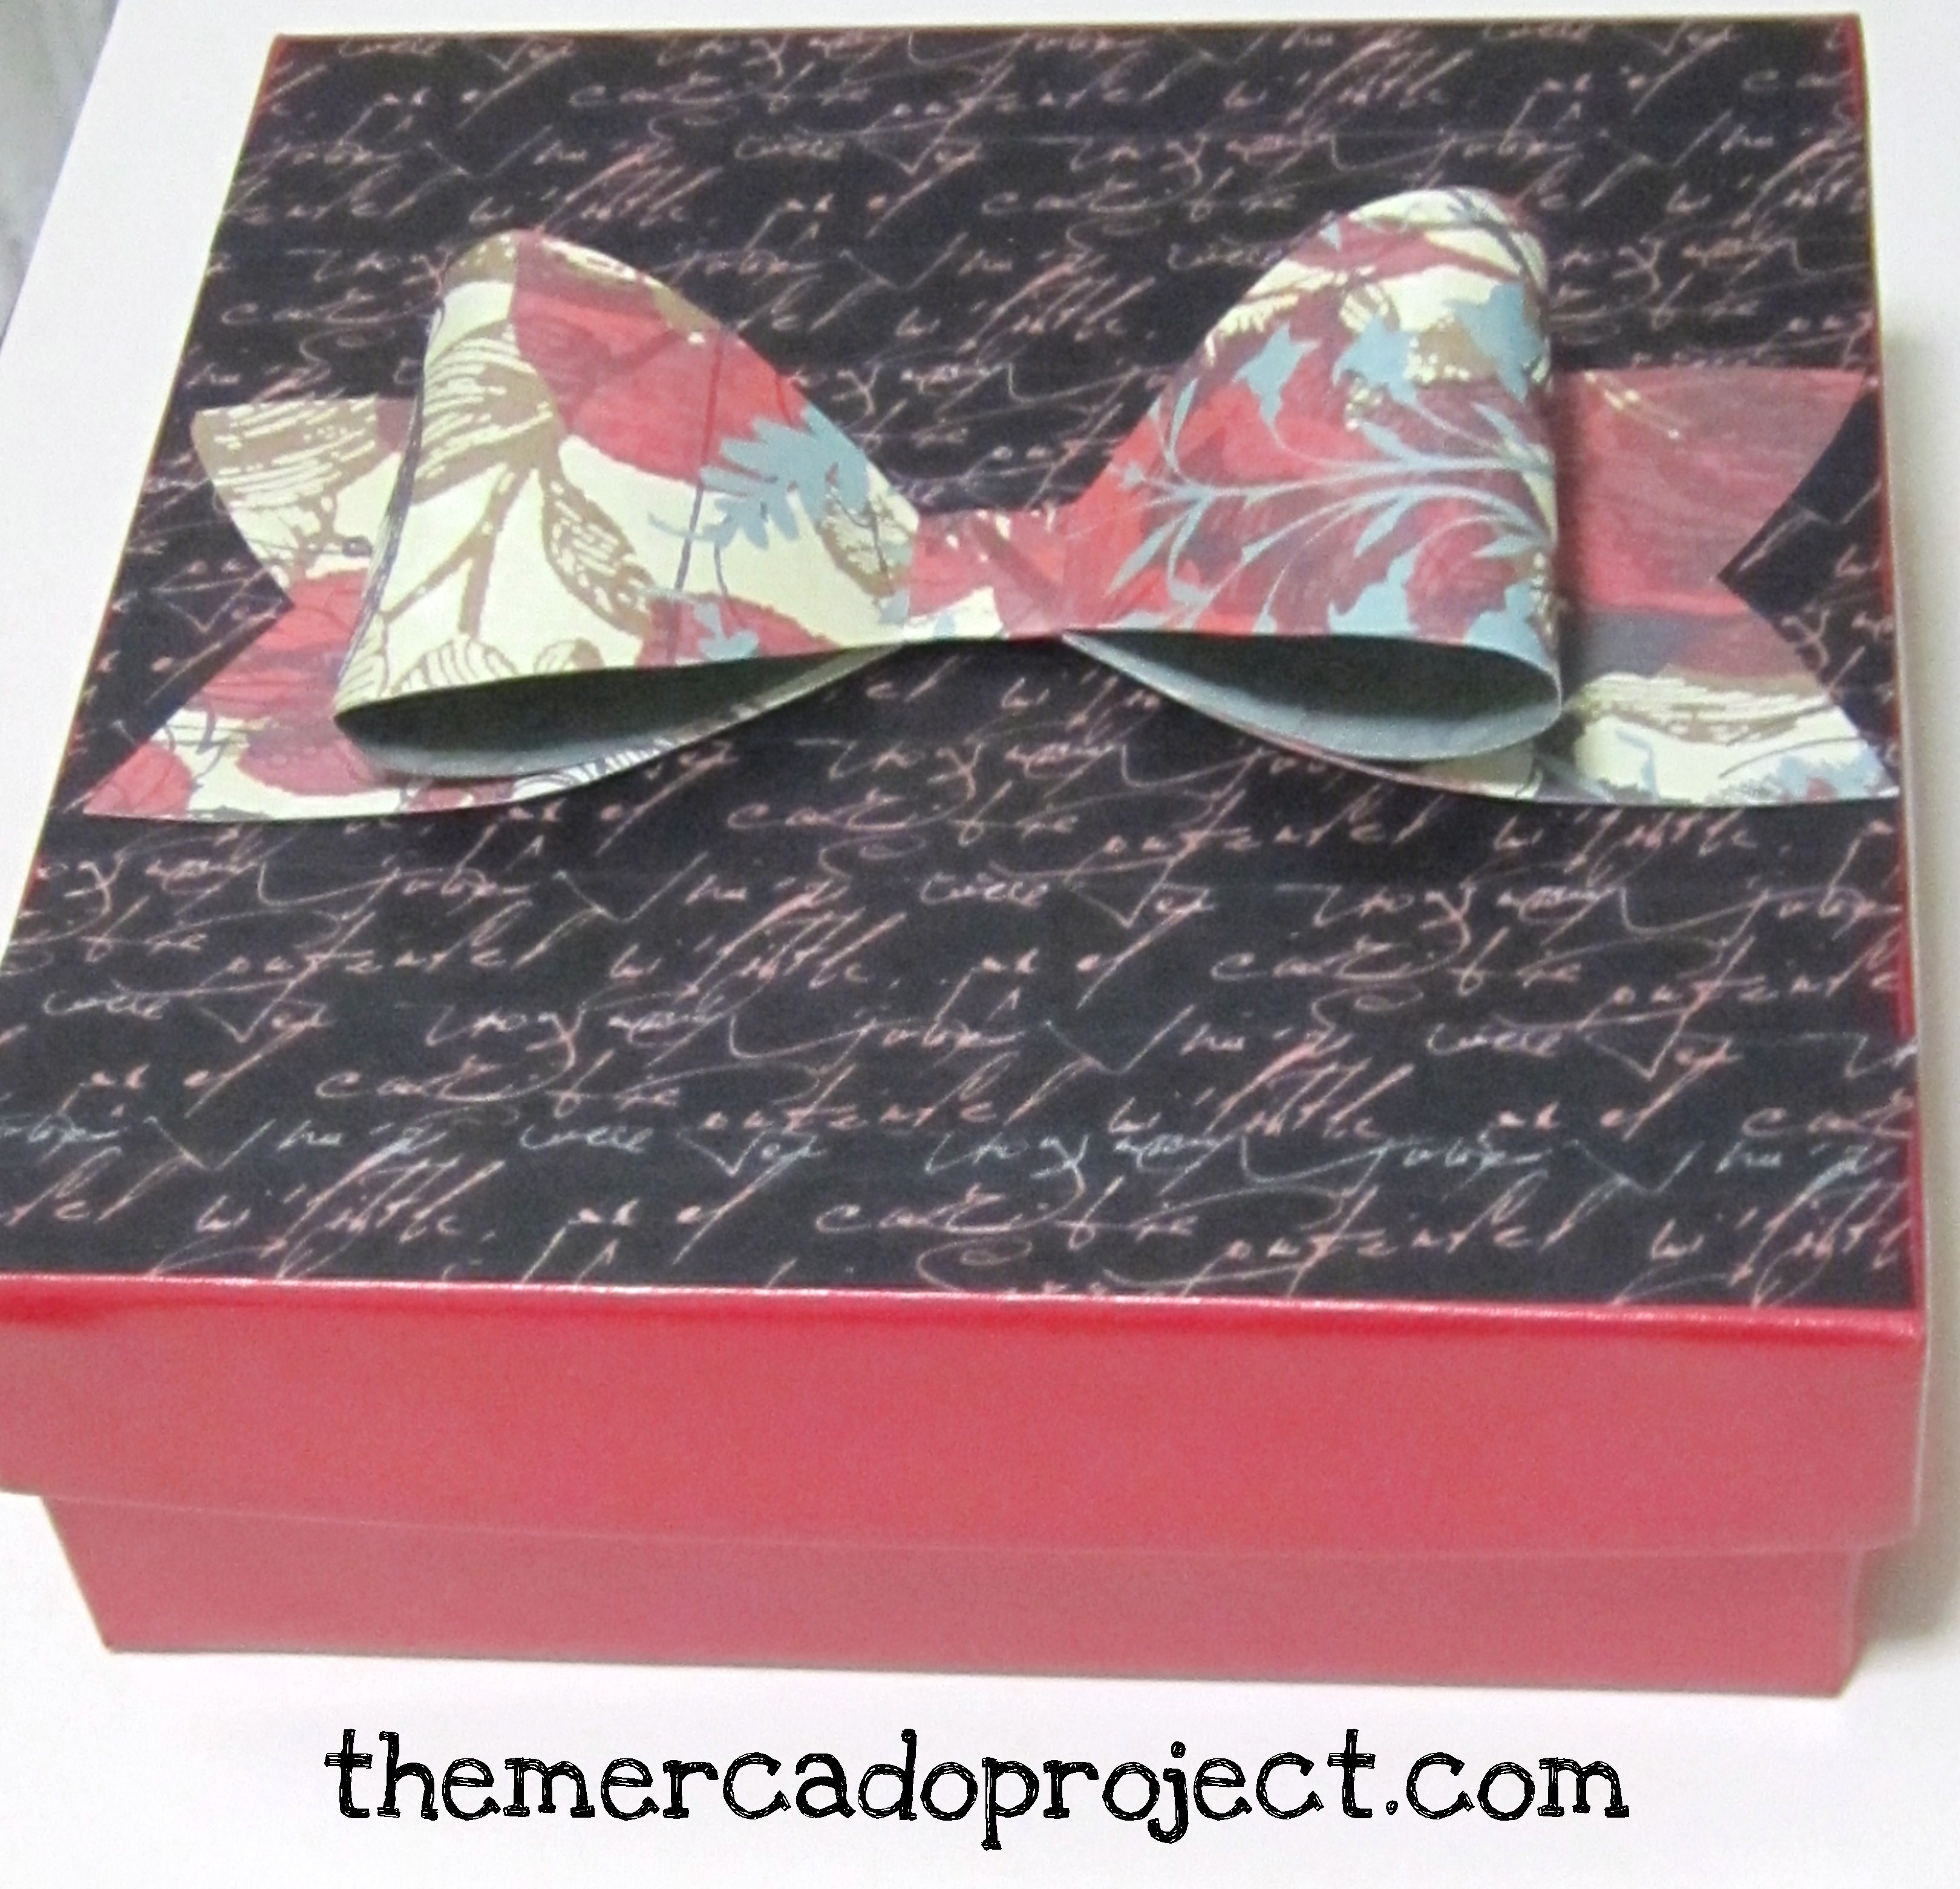
My kindergartener and I decided to decorate an empty graze snack box (graze.com) because it was already partially decorated for Valentine’s Day (red hearts) and it was the perfect size to transform into a purse/clutch valentine holder! 🙂

We just added my daughter’s name in the front (covering the graze name) along with some 3D valentine stickers

and glued a piece of purple construction paper in the back and decorated it with a variety of stickers.

Back

I secured the box with a little bit of clear tape and made a slot, which we decorated with a fabric, flower ribbon, for the valentine cards and treats to go in.

We recycled the clear plastic backing, which you can probably see in the first 2 pics, of the glitter tape decoration that we placed around the box (not shown in the pics) for the purse strap.  I then showed my daughter how she could hold the box two ways:  as a clutch with her hand or a shoulder purse with the strap.  The giddiness that ensued after transforming that box into her valentine holder will stay with me forever. 🙂

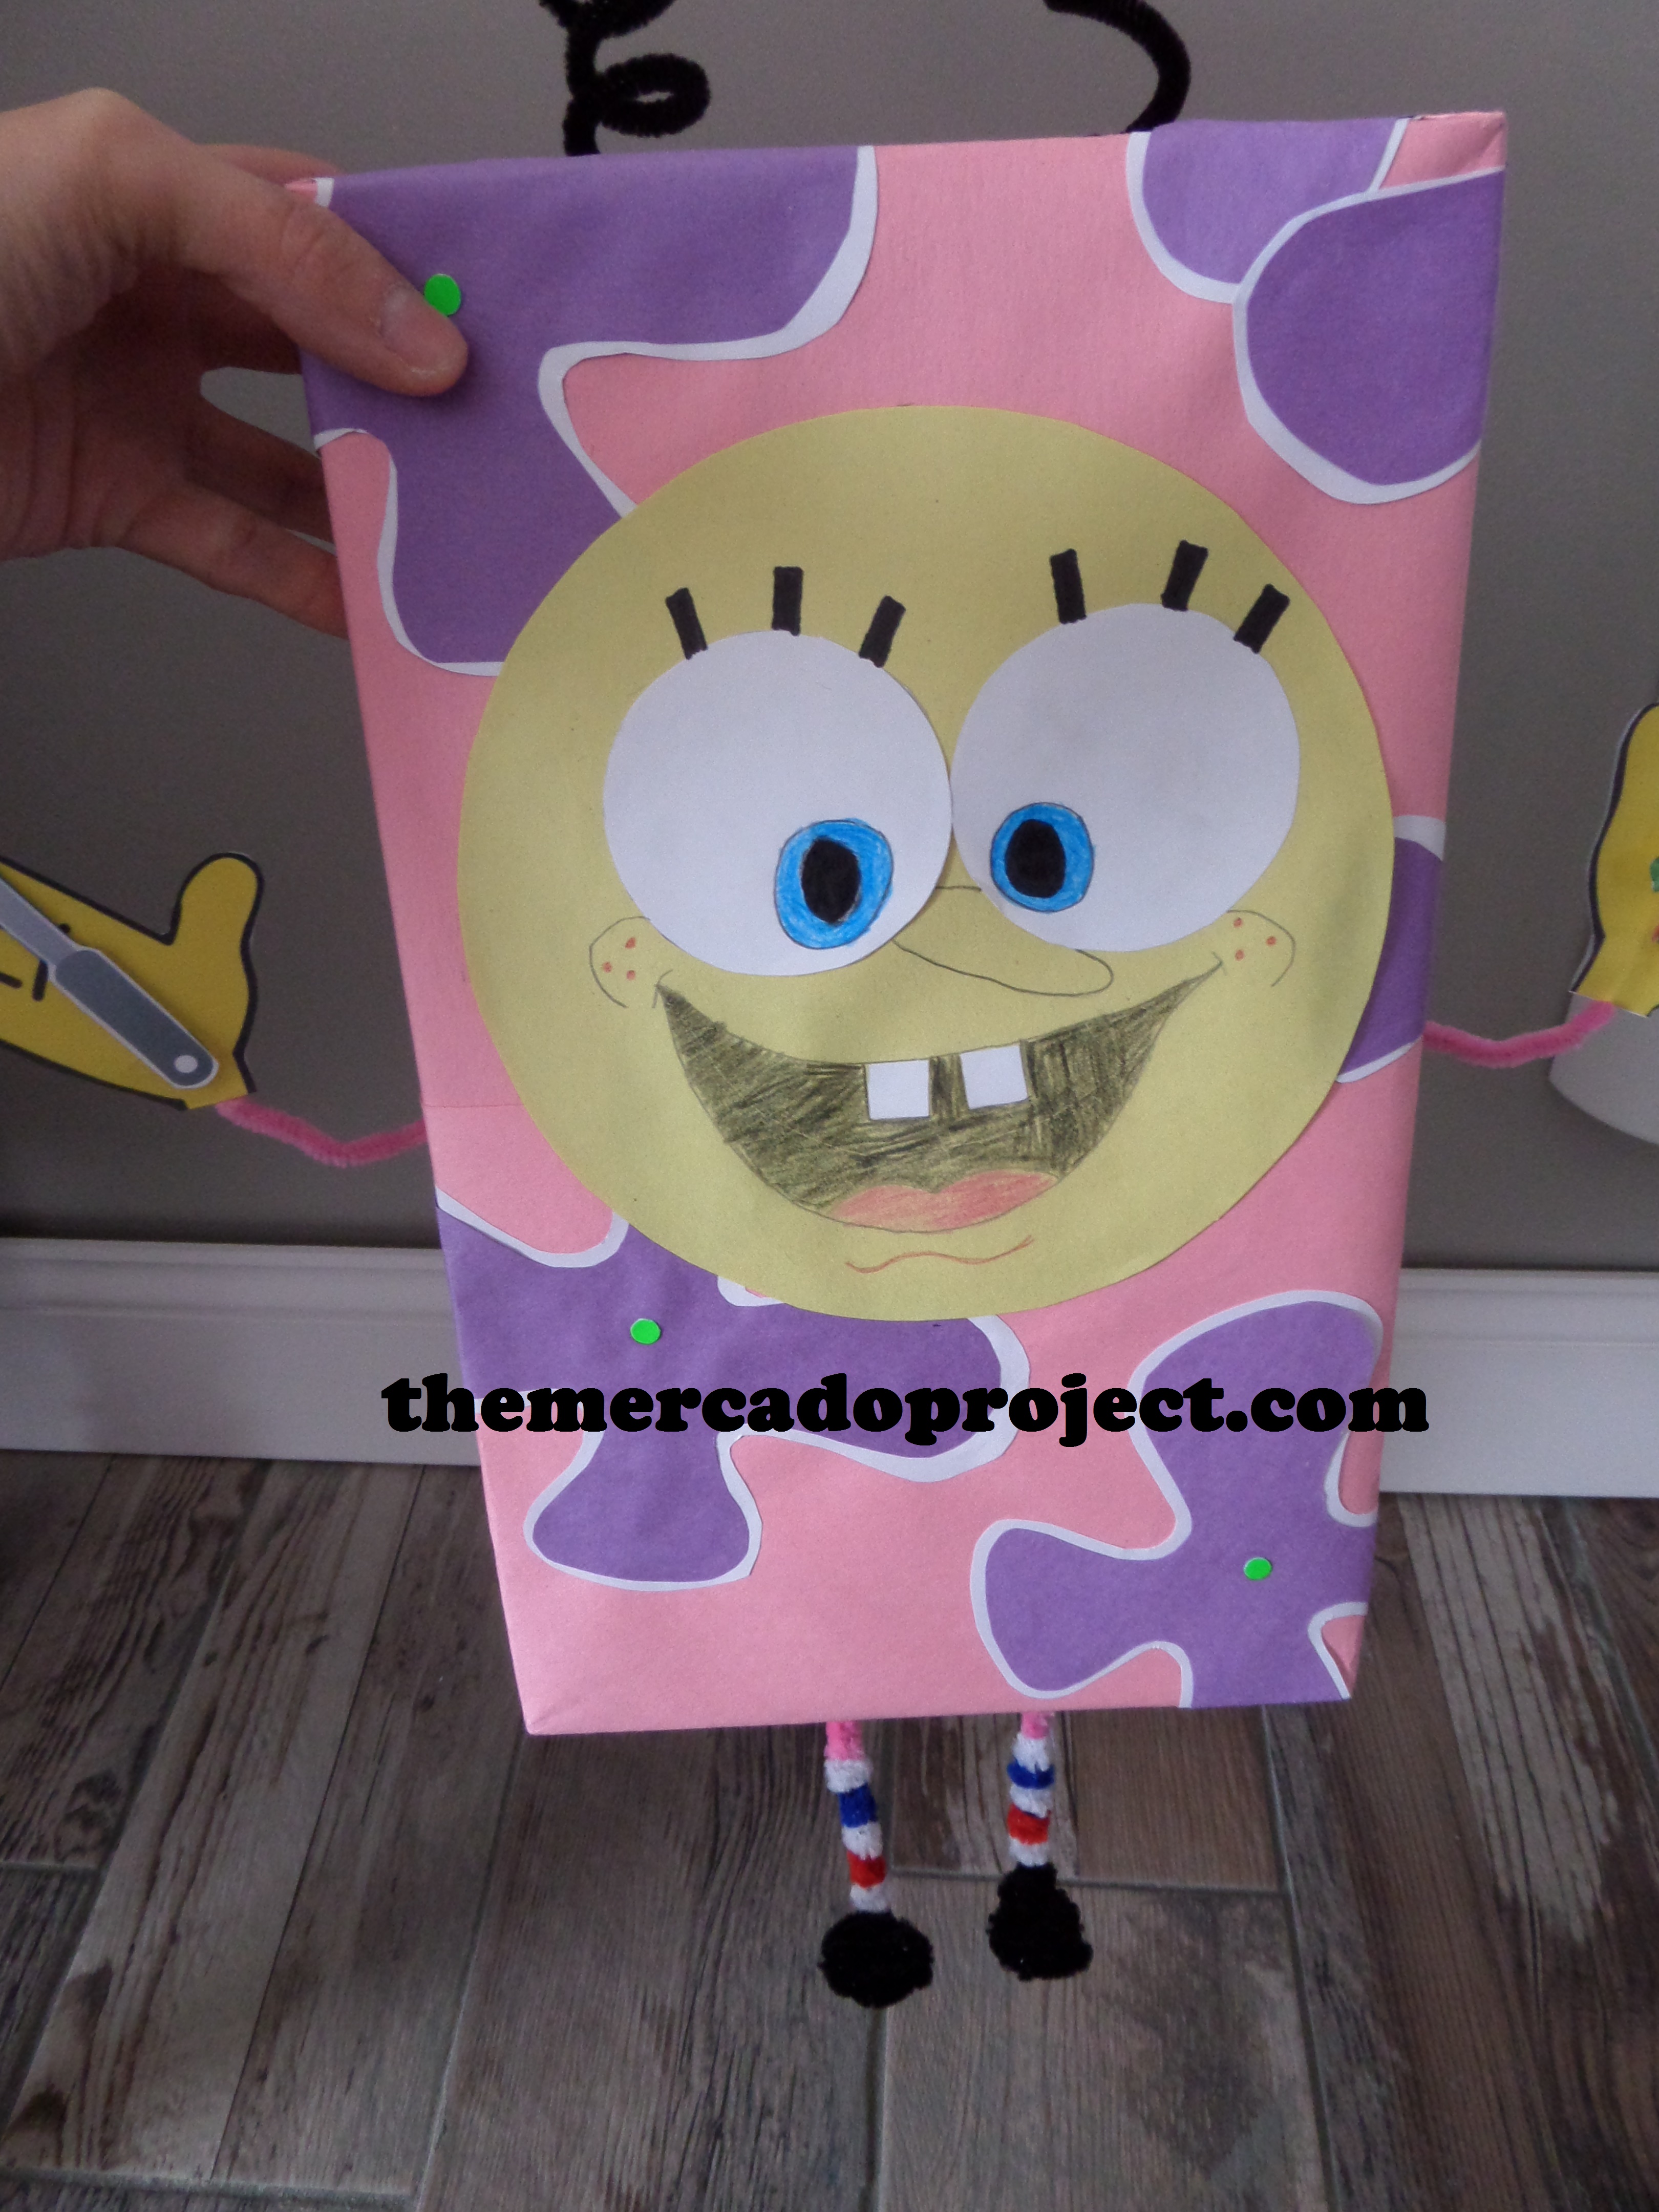
As for my third grader, she had a vision and it involved one of her favorite cartoon characters, SpongeBob Squarepants.  She loves that little dude!

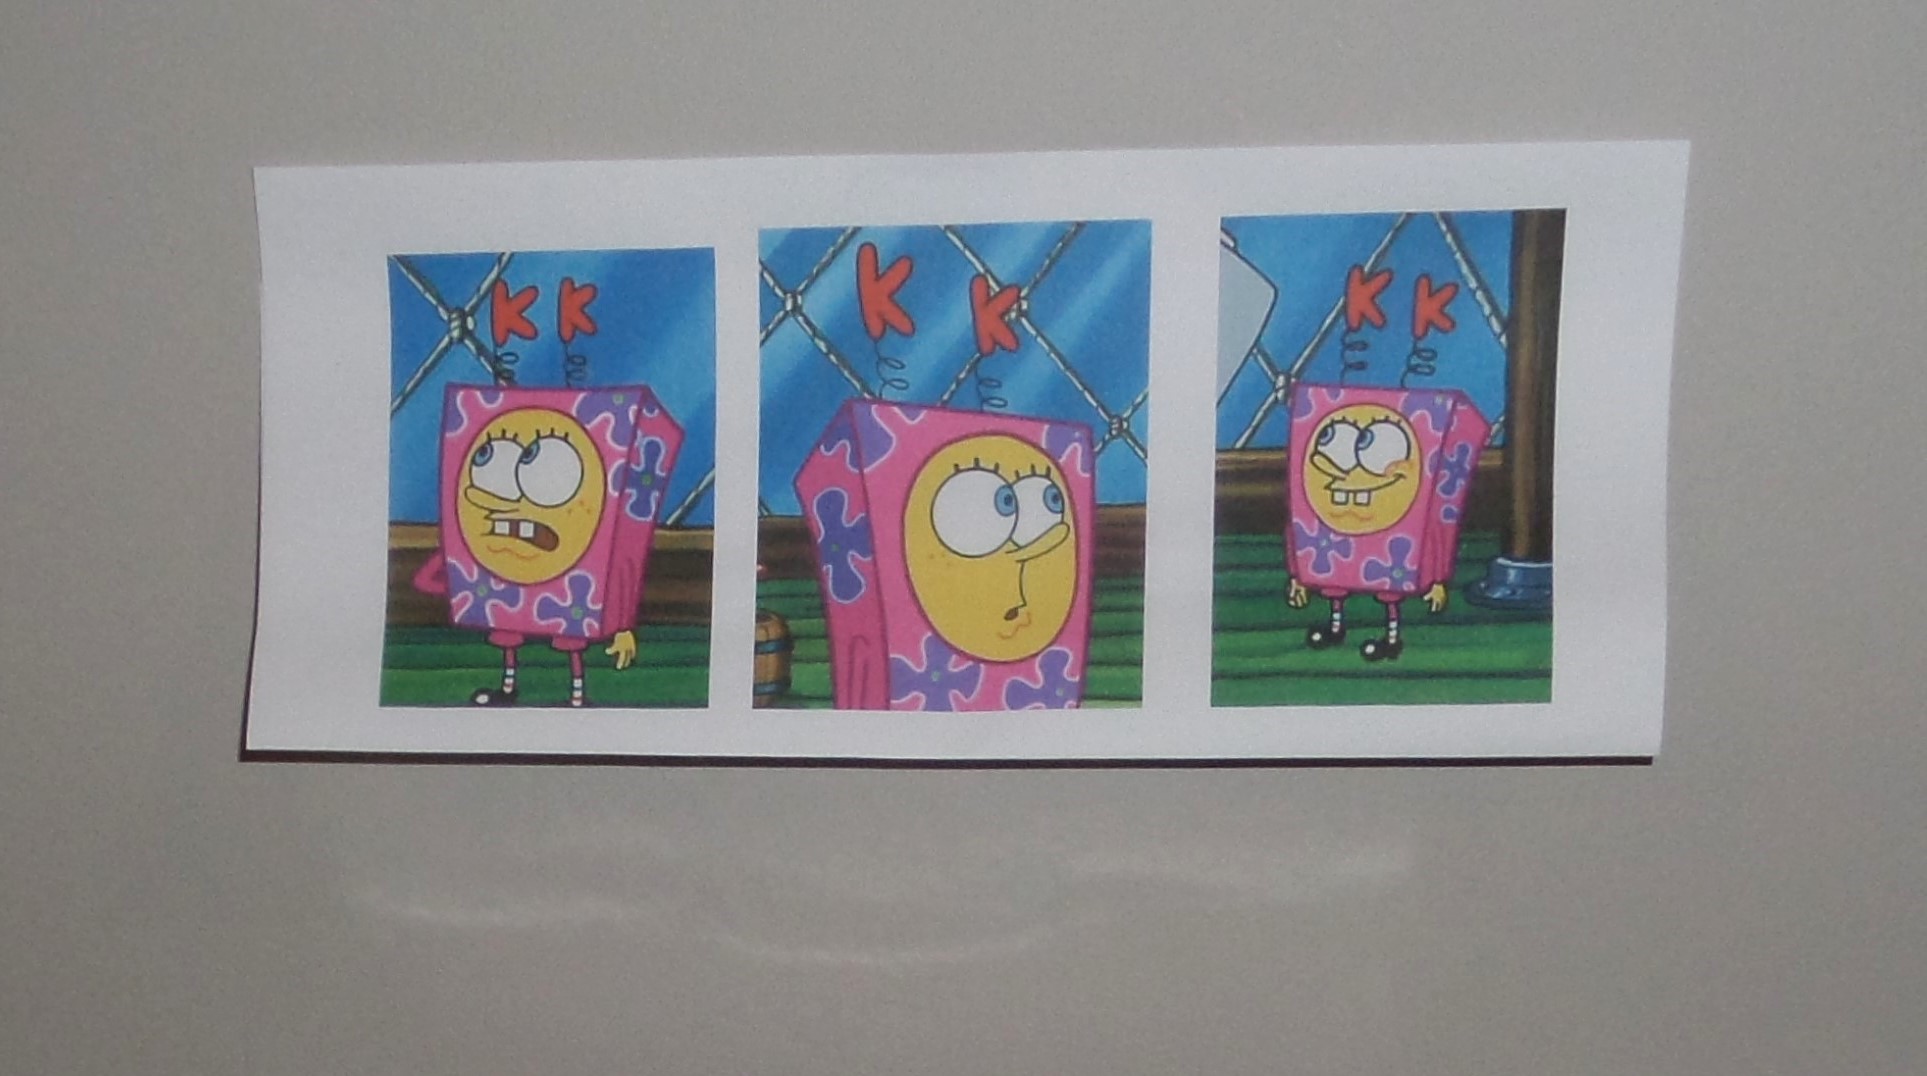
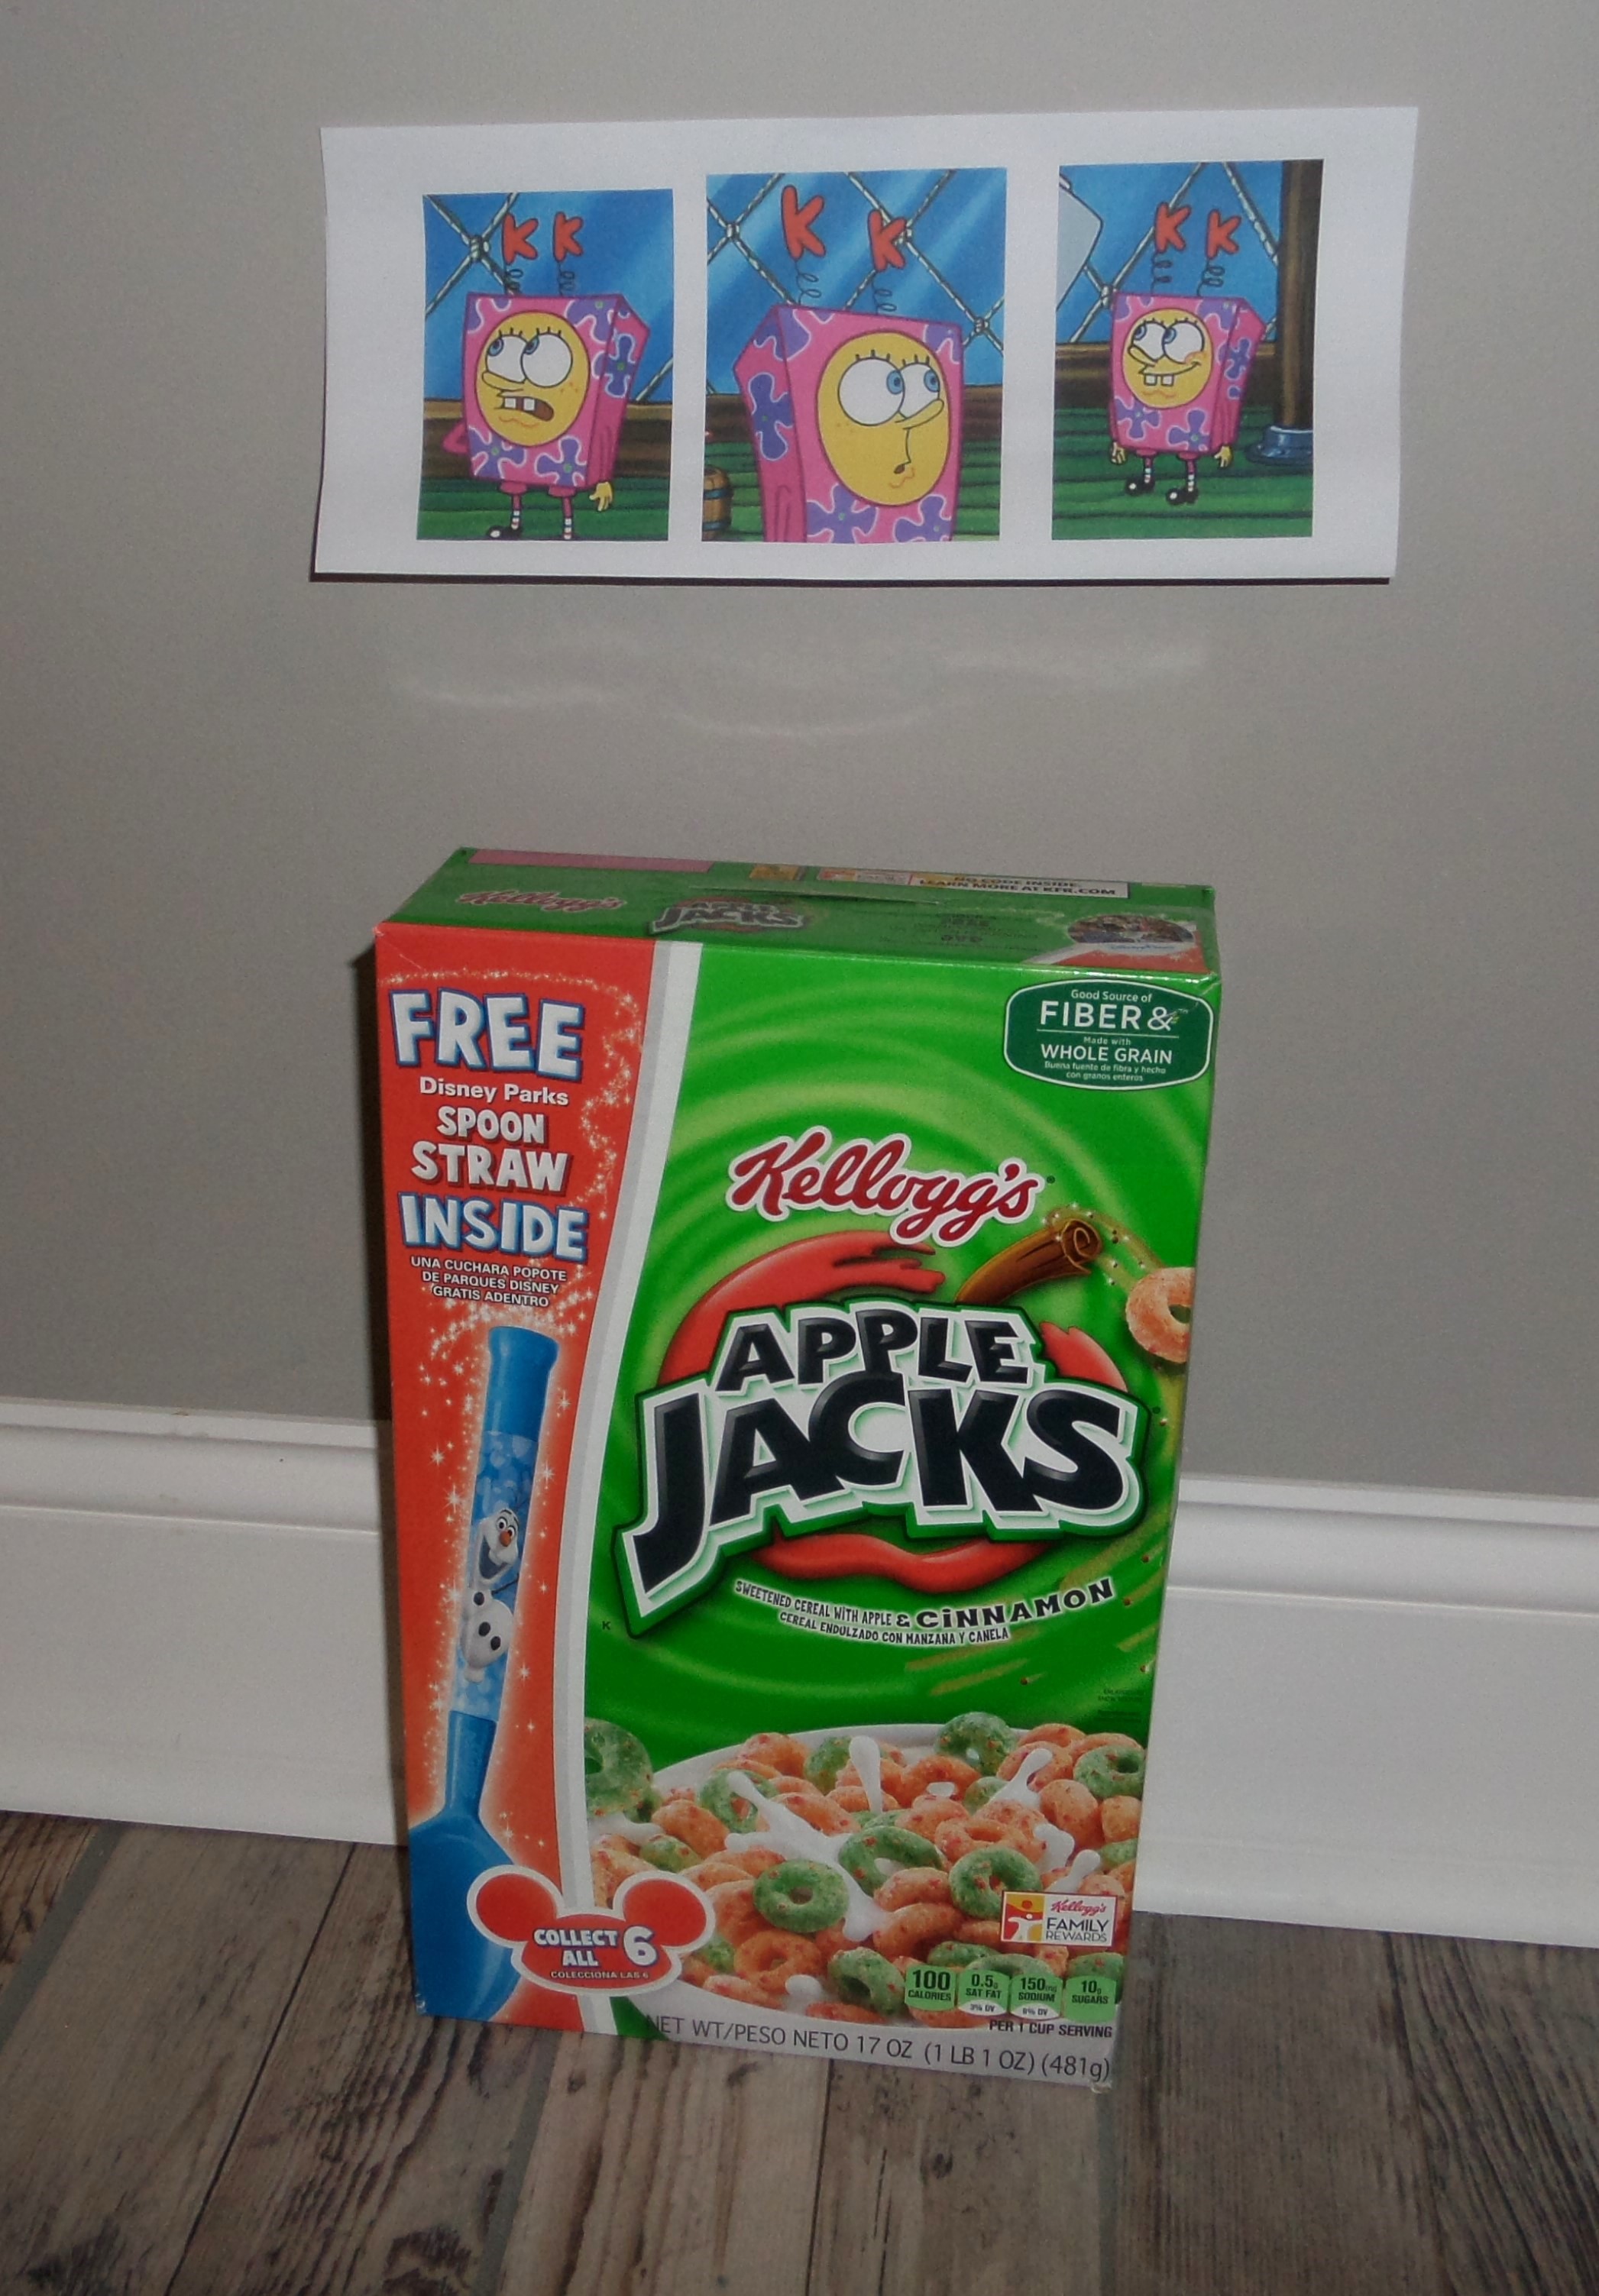
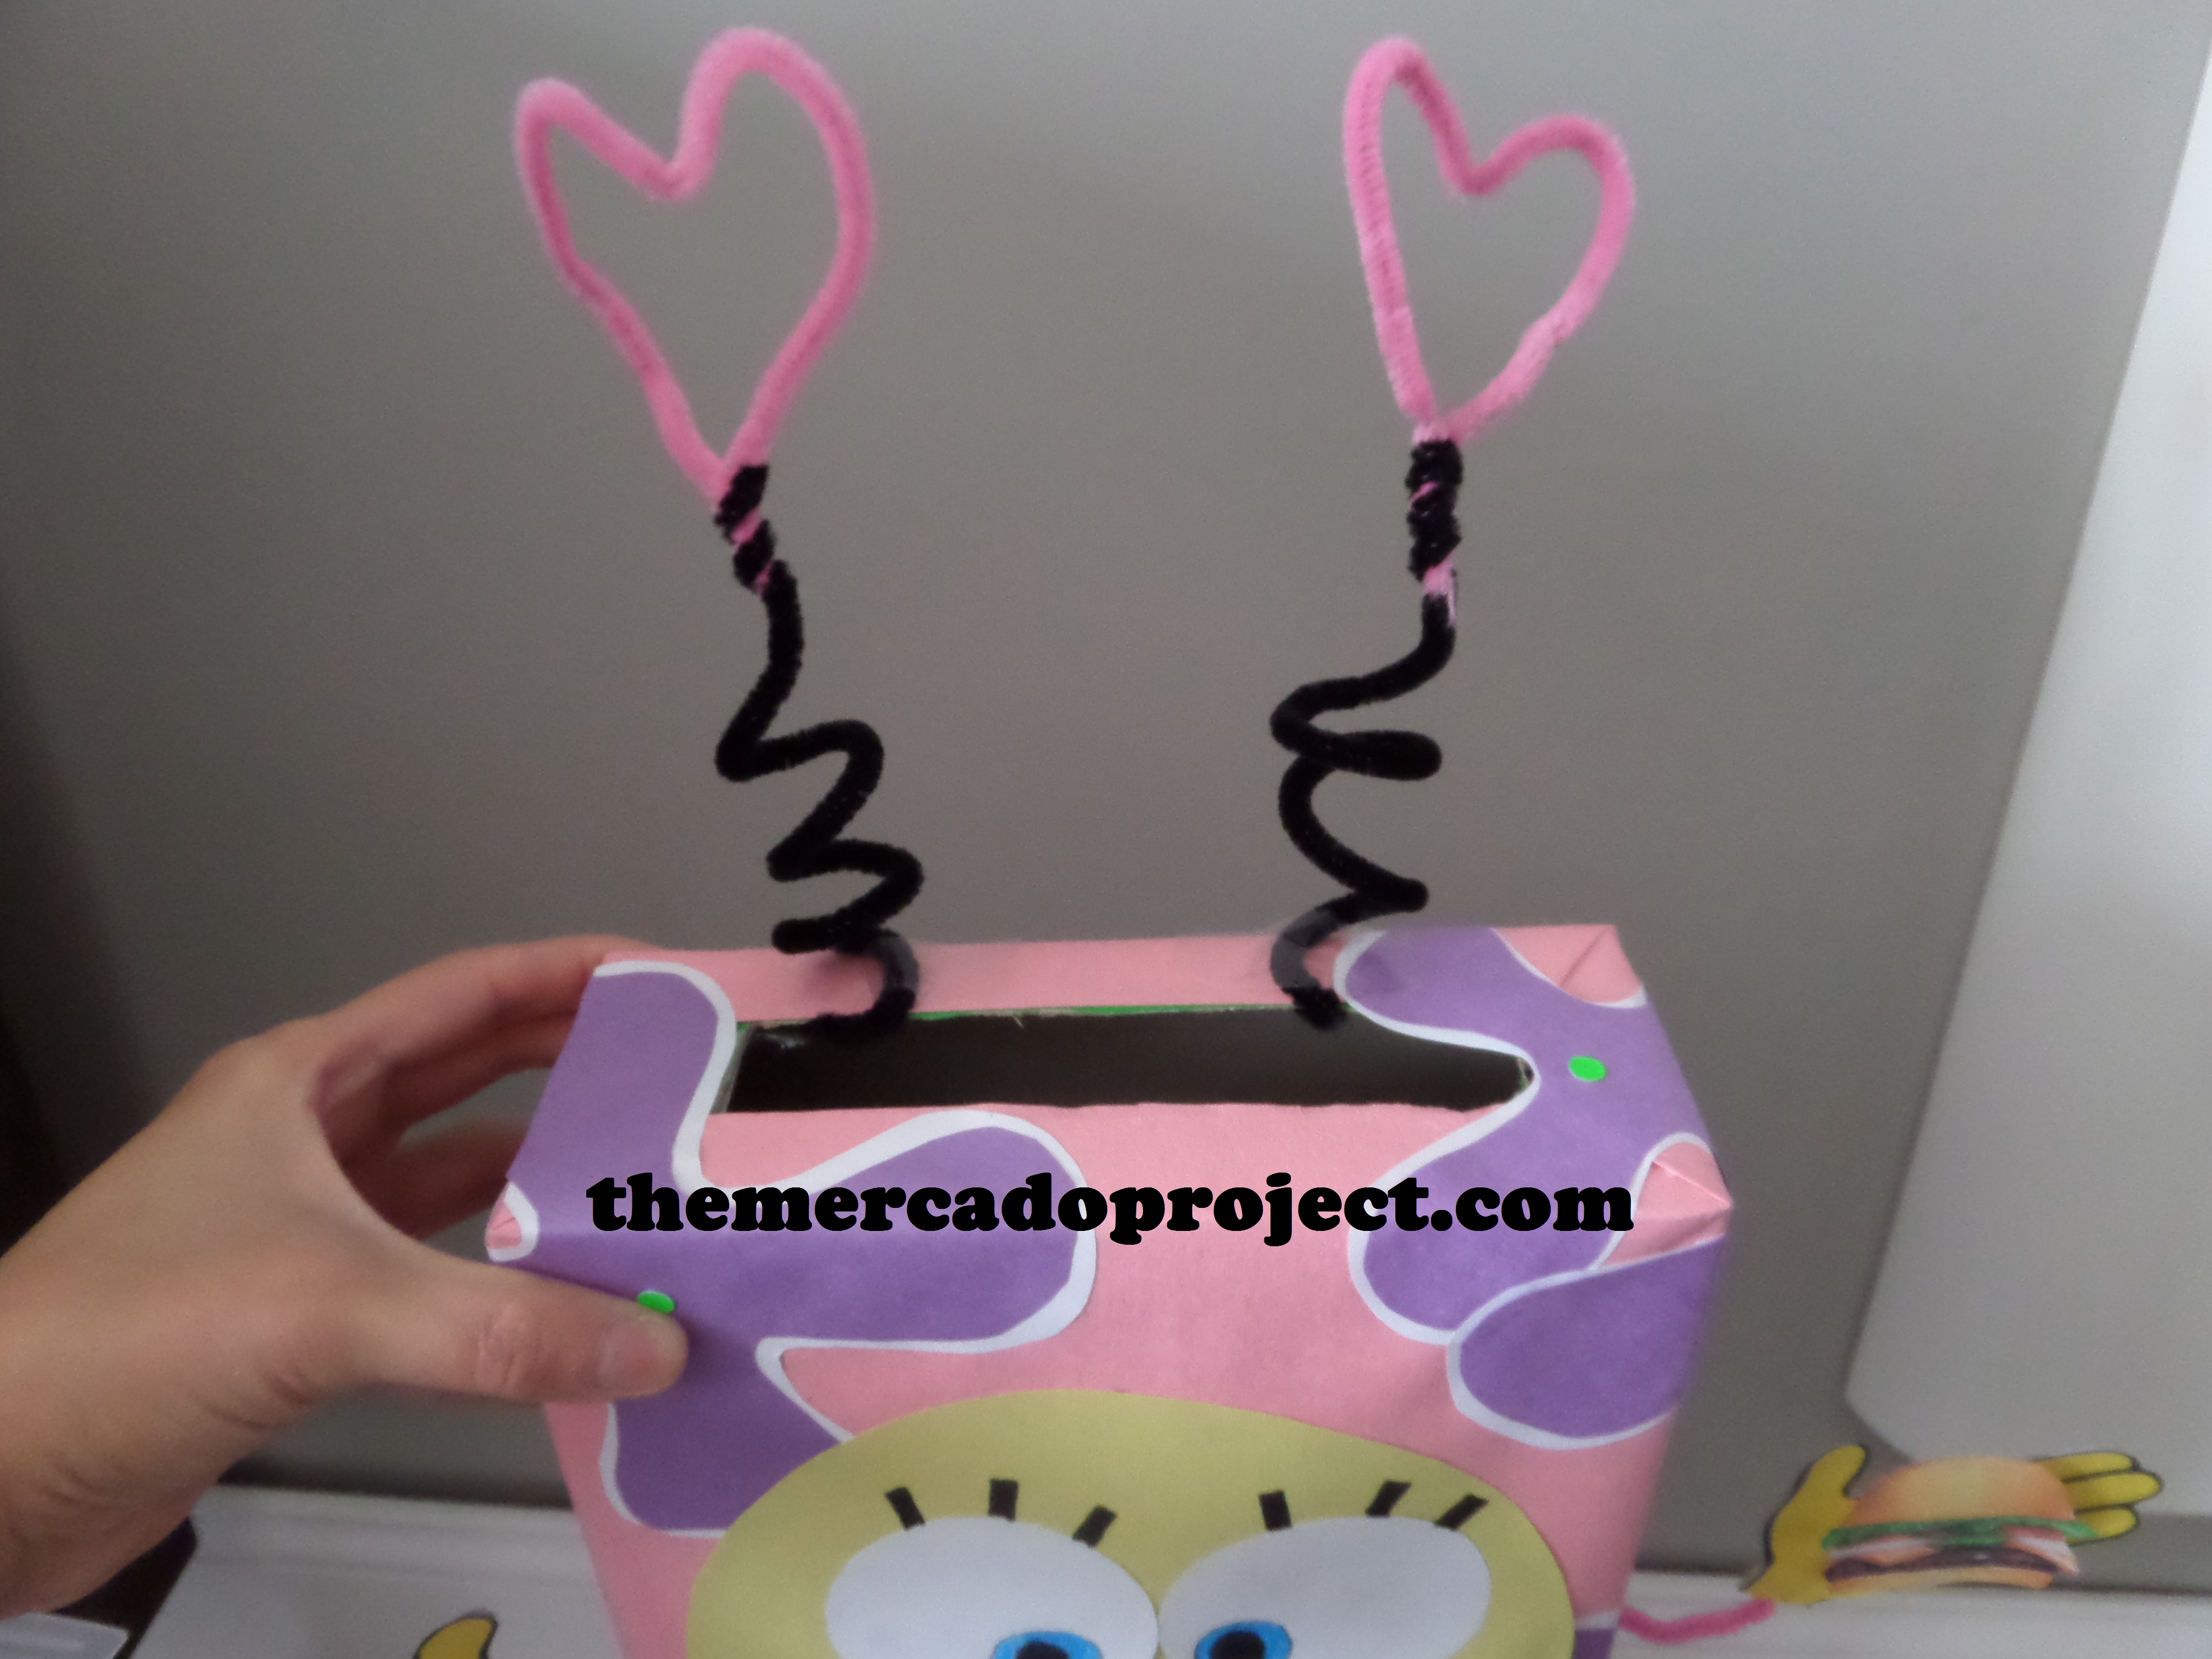
She didn’t want to do plain, old SpongeBob though.  No, she wanted to make SpongeBob in his Kuddly Krab work uniform.   This uniform is featured in the episode titled “Bossy Boots.”

We printed out some pics of SpongeBob wearing the uniform so we could easily reference it.

I also made a template of the purple flower design that’s on the uniform so my daughter could easily trace, cut, and glue the design onto the box.

The materials we used were a cereal box, construction paper (pink, yellow, purple, white, and neon green card stock paper), and pipe cleaners.  We also printed out a small spatula and a “Krabby Patty,” which we taped onto his hands.


From a cereal box to “Kuddly Krab SpongeBob Squarepants!”


Here’s the breakdown: We gift wrapped the box with pink construction paper using tape and glue.  My daughter traced a big circle out of yellow construction paper for his face and two small circles for his eyes with white paper as well as two little squares for his front teeth.  She then drew the details herself.  She used the template for the purple flower designs and we glued those down as well as his face.  The pipe cleaners were used to make the antennas, arms, legs, socks, and shoes.  She wanted to place two pink hearts on the antennas instead of the red K’s.  For his yellow hands I copy and pasted a picture of SpongeBob and cropped the pic until his hands were the only things on the screen, then printed and glued onto the pipe cleaner.  We did the image two sided so it was easier to glue.  A slot at the top of the box ensures that valentine cards and treats will go in nicely!

There you have it!

HAPPY VALENTINE’S DAY EVERYONE!

Take good care all.

Until next time…

DIY Peppa Pig Birthday Banner

Hello everybody!

I hope you guys are well.

My youngest daughter turned 4 years old this past Saturday.  I wish I could have captured on camera how her morning, sleepy face transformed into sheer happiness upon hearing us say, “Happy Birthday Sophia!”  It was magical and so sweet.  I did take a ton of pictures after we got all dressed up, but I have to sort through them first.  For this post, I wanted to share with you how I made her a Peppa Pig birthday banner.

Enjoy!

CAM00734-1text

CAM00738text CAM00739text CAM00750text

This banner was super easy to make and didn’t take long.  I found the banner template online.  I had foam flower cut outs saved from a great find at the dollar section in Target.  I did the happy, birthday, and letter circles myself on Word, then glued everything together and strung it up with pink ribbon.

I absolutely loved how this banner came out and my daughter loved seeing it up on the wall.  The theme was Peppa Pig and she loved seeing all the different pictures of Peppa Pig.

More pictures to come.

Take good care all.

Until next time…

DIY PERSONAL PIZZAS

Hello everybody!

I hope you guys are well.

We had a snowstorm yesterday and today’s temperature outside is 8 degrees.  Yup, eight!  So, we did the most logical thing and stayed home.

With both my girls running around and enjoying their time together, I decided to make personal pizzas for lunch.

IMG_6331text

Marinara sauce, wheat flatbread, and shredded mozzarella cheese

That’s all you need for a cheesy pizza.

IMG_6333text       IMG_6339text

375 degrees in the oven for 7 – 8 minutes

Bon appétit

IMG_6344text     IMG_6345text

Of course, you can always add other stuff.

This was my pizza.  I added green pepper, chopped onion flakes, and garlic powder before putting it into the oven.

What do you like on your pizza?

Take good care all.

Until next time…

DIY CHRISTMAS ORNAMENTS

Hello everybody!

I hope you guys are well.

I wanted to see if I could make some Christmas ornaments using cookie cutters and air dry clay.  Guess what?  It worked.  This is going to be a great project for the weekend with my girls.

IMG_6233text

Things I used: mini rolling pin that’s used for clay activities, toothpick, cookie cutters, and air dry clay

IMG_6234text

I pressed little alphabet beads into the heart, spelling out LOVE, and two gold beads for Mr. Gingerbread

IMG_6236text

According to the container, it takes about 2 – 3 days for the clay to dry.  Since I pressed little beads into the clay it did crack a bit during the drying process.  I just used a toothpick and inserted a little bit more clay in the areas that was noticeable then let the clay dry once again.  I used pink and white twine to string it up the heart.

IMG_6241text

I painted Mr. Gingerbread a lovely Acorn color (Martha Stewart acrylic paint) with a small paintbrush.

This project has endless possibilities!

Take good care all.

Until next time…

Washi tape to the rescue…

Hello everybody!

I hope you guys are well.

Here’s an idea to spruce up any plain boxes you may have around (in my case: a cardboard red box that stores my bracelets) or even gift boxes for upcoming Christmas presents.  You can use washi tape.  They come in many designs and can be easily removed so if you make a mistake or get tired of the design, just peel it off and reposition or pick another design.

washitapeandbox1text  washitapeandbox2text

I chose a script writing washi tape that I found at A.C. Moore on sale.  These little tapes can be expensive so when they go on sale get as many as you can.  If you’re a crafter, you won’t regret the purchase.  I just covered the top of the box and lined up the tape so it would look like a continuous design.

washitapeandbox3text  washitapeandbox4text  washitapeandbox5text

I wanted to see the finished box with a gift bow so I took out my scrapbook paper, which I also got on sale at AC Moore (buy, buy, buy) and my bow template courtesy of http://howaboutorange.blogspot.com/2013/04/how-to-make-paper-bow.html.

washitapeandbox6text  washitapeandbox7text

washitapeandbox8text     washitapeandbox9text

I love my cardboard red box now more than ever and if I was gifting this box, I would add the paper bow.

  IMG_6099      washitapeandbox10text

I decorated my kids play doh accessories box with the Super Mario (brand DUCK TAPE) design (found it at AC Moore, not on sale 😦 ).  I found the birthday duct tape and glitter tape at the dollar section in Target.  Yup, $1 .  Score!  The other washi tapes that I have are silhouette birds on a wire and cloudy sky with red hearts.  I have a strong feeling this tape collection is going to be growing.  I’m gonna need a big storage box, STAT!

Take good care all.

Until next time…

DIY Minion

Hello everybody!

I hope you guys are well.

I have a great craft idea that came from my darling, beautiful and very crafty 6-year-old daughter, Olivia.  With a toilet paper roll, construction paper, glue, markers, scissors, and googly eyes Olivia made her very own minions from the movie “Despicable Me.”  She came up with this idea on her very own so I’m sharing it with you step by step.  Enjoy!

IMG_6038text

My husband put up a ledge shelf for Olivia’s Arts and Crafts finished projects.  Here are her Minions – Ballerina, Mom, Dad, and Baby Minion

IMG_6025text     IMG_6026text

I covered the toilet paper roll with yellow construction paper.  I added the googly eyes with the glue dots.  Then traced around the eyes with the silver marker to make the goggles and used the black sharpie to make the band.

IMG_6027text   IMG_6028text

Using the sharpie I drew the smile and hair.  With the blue construction paper I made the front of the overalls, adding a pocket and the letter G for Gru.

IMG_6029text     IMG_6032text

I glued the construction paper using the Fabri – Tac glue because it works best for me.  I used the glue dots for the small strips of construction paper.  You can always make the Minion with one eye like the toy figure pictured.

IMG_6037text

Here’s my finished Minion.

This is a fun craft project for your kids and it’s also a great decorating idea for any Minion party!

Take good care all.

Until next time…

Happy Belated Halloween 2013

Hello everybody!

I hope you guys are well.

This year for Halloween the Mercado household dressed up as…

IMG_5982text

…Princess Peach, Mario, Luigi, and Yoshi from Super Mario Brothers

IMG_5988text IMG_5992text IMG_6006text

I so wanted to recreate that picture above with the stuff toys, but a certain little girl/Yoshi didn’t want to cooperate and get into the costume my talented husband created, so we went Yoshiless.  My oldest daughter, Olivia, was Princess Peach (costume gown and crown bought early at Target.com), my husband was Mario and I, as you can see, turned into Luigi.  I couldn’t smile comfortably with that darn moustache on my face.  🙂

We bought the white gloves, blue suspenders, and moustaches at Party City.  I ordered a set of Mario and Luigi hats through Amazon, but unfortunately they didn’t arrive on time so I took matters into my own hands…

CAM00222text

I took hats that we already owned and using felt, tape, glue, safety pins and a sewing needle I transformed them temporarily.

IMG_6013text

This idea popped into my head the day before Halloween so I had to hustle in order to have them ready for pics and trick or treating, which only my husband did with my oldest ’cause turns out my youngest was running a fever that night and I had to stay home with her.  That’s why she was refusing to cooperate.  She wasn’t feeling well.  😦  I was able to put a costume on her in the morning when we took her sister to school.  At that time she was okay.

sophiaflowerfairy2013text

My little forest fairy!

Several days later I was able to make Yoshi come to life…

IMG_6007text  IMG_6011text IMG_6017text

…here’s Sophia in a homemade Yoshi costume.

My husband purchased a green t-shirt and felt (white, red, orange, and green) at A.C. Moore craft store.  He made the shell using red and white felt and sewed it together.  He stuffed it with polyester fiberfill (Sophia can use it later as a small pillow).  In front of the shirt, he sewed a white felt circle and then attached/sewed the shell in the back of the shirt.  He constructed the head-piece on his own, using green, orange, and white felt.  He drew the eyes and nostrils with a sharpie marker and to make the nose prominent he used a little of the fiberfill and sewed it up.  There you go, it’s Yoshi from Super Mario Brothers!

I hope your Halloween for 2013 was fun and safe.

Take good care all.

Until next time…

Bats, Banners, and Door Monsters…Oh My!

Hello everybody!

I hope you guys are well.

October has definitely rolled in and I’ve been busy decorating my home for Halloween.  I try to put things up in the night while the girls are asleep so in the morning they’ll have a spooky surprise.  We’ve also been brain storming on how we’re going to put together our family costumes because we’ve chosen a group theme this year.  So far, my oldest daughter is the only one who has her costume already (bought it online a while back).  I just need to buy some white, long, satin gloves and take some major wrinkles out of her dress…that’s all the hints you’re going to get.  🙂

Here’s a look at some of my Halloween decorations either taken out of storage or recreated:

IMG_5931text IMG_5932text

IMG_5941text

I had some bats stored away, but since I like them so much I decided to make some more.  I simply used a bat template, printed on cardstock, and then traced with a pencil on black construction and cardstock paper.  I taped them up on several walls in my living room as well as the entry wall.  As soon as you walk in your eyes simply get drawn to them.

IMG_5939text

I made this pennant banner last year!  I placed it in the hallway outside my front door.

IMG_5938text   IMG_5943text

I went to the craft store and found these small foam cutouts, in packs of five, and just taped them up in my living room.

I searched for ghost templates and printed these cuties out on cardstock and just added googly eyes.

IMG_5933text   IMG_5936text

And last, but not least, my door monsters.  Last year, I was inspired by a picture on Pinterest and decided to make my own.  This year, I decided to make two of them.  One on the door in my living room and another on the small closet door in my office space/playroom.  I used party streamer paper and paper plates for both monsters.  My girls absolutely love these guys and so do I.

Happy decorating!

Take good care all.

Until next time…