Happy Valentine’s Day!

Hello everybody!

I hope you guys are well.

Valentine’s Day is fast approaching and at my daughter’s school they did something pretty cool this year.  They wanted their students to decorate and bring in a valentine holder for their valentine cards and treats.

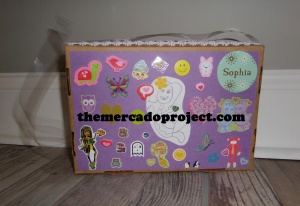
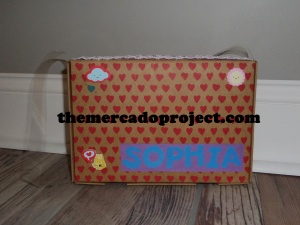
My kindergartener and I decided to decorate an empty graze snack box (graze.com) because it was already partially decorated for Valentine’s Day (red hearts) and it was the perfect size to transform into a purse/clutch valentine holder! 🙂

We just added my daughter’s name in the front (covering the graze name) along with some 3D valentine stickers

and glued a piece of purple construction paper in the back and decorated it with a variety of stickers.

Back

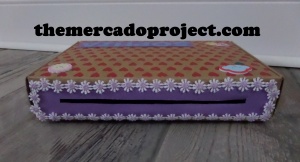
I secured the box with a little bit of clear tape and made a slot, which we decorated with a fabric, flower ribbon, for the valentine cards and treats to go in.

We recycled the clear plastic backing, which you can probably see in the first 2 pics, of the glitter tape decoration that we placed around the box (not shown in the pics) for the purse strap.  I then showed my daughter how she could hold the box two ways:  as a clutch with her hand or a shoulder purse with the strap.  The giddiness that ensued after transforming that box into her valentine holder will stay with me forever. 🙂

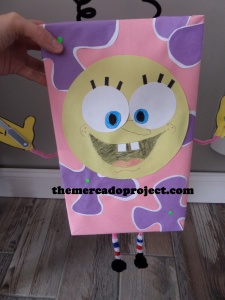
As for my third grader, she had a vision and it involved one of her favorite cartoon characters, SpongeBob Squarepants.  She loves that little dude!

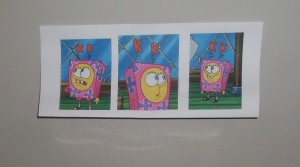
She didn’t want to do plain, old SpongeBob though.  No, she wanted to make SpongeBob in his Kuddly Krab work uniform.   This uniform is featured in the episode titled “Bossy Boots.”

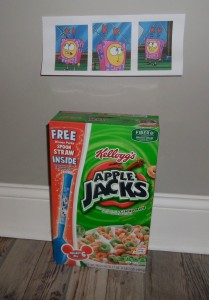
We printed out some pics of SpongeBob wearing the uniform so we could easily reference it.

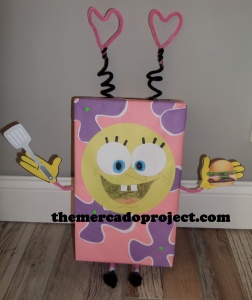
I also made a template of the purple flower design that’s on the uniform so my daughter could easily trace, cut, and glue the design onto the box.

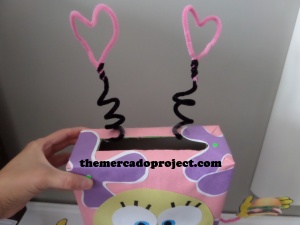
The materials we used were a cereal box, construction paper (pink, yellow, purple, white, and neon green card stock paper), and pipe cleaners.  We also printed out a small spatula and a “Krabby Patty,” which we taped onto his hands.


From a cereal box to “Kuddly Krab SpongeBob Squarepants!”


Here’s the breakdown: We gift wrapped the box with pink construction paper using tape and glue.  My daughter traced a big circle out of yellow construction paper for his face and two small circles for his eyes with white paper as well as two little squares for his front teeth.  She then drew the details herself.  She used the template for the purple flower designs and we glued those down as well as his face.  The pipe cleaners were used to make the antennas, arms, legs, socks, and shoes.  She wanted to place two pink hearts on the antennas instead of the red K’s.  For his yellow hands I copy and pasted a picture of SpongeBob and cropped the pic until his hands were the only things on the screen, then printed and glued onto the pipe cleaner.  We did the image two sided so it was easier to glue.  A slot at the top of the box ensures that valentine cards and treats will go in nicely!

There you have it!

HAPPY VALENTINE’S DAY EVERYONE!

Take good care all.

Until next time…
Dads Take Your Child To School Day

IMG

Hello everybody!

I hope you guys are well.

Today was a special day at my daughter’s school.  It was their annual “Dads Take Your Child To School Day” (A project of the NYS Office of Children and Family Services and NYS Office of Temporary and Disability Assistance).  It’s special in my household because I’m normally the one that takes my daughter to school while my husband goes to work early, but today Olivia got to walk hand in hand with her daddy all the way to school.  Just them, and the smile on her face as I waved goodbye from my window was priceless.  It’s very important for children to have a male figure they can count on in their lives.  The flier that was sent home with my child inviting dads to this event also stated that “If dads are unavailable to attend the event, invite grandfathers, foster fathers, step-fathers, uncles, cousins, big brothers, significant male caregivers or male friends of the family.”

I applaud this project and their efforts to promote awareness that everyone in the family plays a very important part in a child’s life.  My husband absolutely loved taking part in this event because he’s a devoted father and he’s always curious to see how things run, especially his child’s school.  He was able to see Olivia in her class first hand and she was able to introduce him to her classmates.  It was a win, win situation that’s worth it in the long run.

Start building a great relationship with your child and their school today.

Take good care all.

Until next time…
DIY PAPER HEART GARLAND

Hello everybody!  I hope you guys are well.  I wanted to show you another pin from, you guess it, www.pinterest.com, in which I used to make a paper heart garland as part of my anniversary centerpieces.  I absolutely loved this paper idea and I knew I was going to incorporate it one way or another.  Plus I had fun doing this project.

Pin with instructions (Thank you to the creator of this)

My version using turquoise and gold speckled cardstock. I used my Cricut paper trimmer and a paper clip to close the hearts into a circle.

              I made 9 hearts in turquoise and 2 in gold, symbolizing a total of 11 years happily married and the 2 gold hearts for my daughters. 🙂

Take care all.  Until next time…

DIY project with iron on transfer, a great picture and a tote bag

Hello everybody! I hope you guys are well.  Today I want to share with you a project that I love to make and give as a gift.  I love to add an unexpected and personal touch to a gift that actually comes from the person the gift is intended for.

For example:

My wonderful cousin, Janice, is an amateur photographer and she currently lives in Huntsville, Alabama.  Needless to say, I MISS HER GREATLY!  One day while driving, she spotted a gorgeous, enormous tree.  The sun was illuminating it perfectly.  A scene like that, you got to act fast if you want to capture it for life.  So she quickly pulled to the side of the road, got her trusty camera, and took several shots.

Ninety-five percent of the time when I receive a letter or greeting card from my cuz, there’s a picture or more inside.  Who’s the subject of the picture?  That’s the exciting part.  It’s always different.  It could be a funny picture of one of her cats, a butterfly outside her window, art displayed on the sidewalk in the city, a waterfall, horses, etc.  We love corresponding through snail mail because it’s so much more personal and it’s our special thing.  When I received a copy of her magnificent tree, it spoke volumes on how good of an eye she has and how talented she is with her camera.  This picture needed to be displayed, for her, but where?

Here’s the pic:

I love using iron on transfers, especially on t-shirts, but I wanted to use something different.  At A.C. Moore craft store, I stumbled upon cotton tote bags.  They were like blank canvases that you could decorate, but instead of hanging them on the wall, you could carry your masterpiece for all the world to see.  You could wear a t-shirt for a day, but you can carry your bag almost every day. 🙂

After scanning the picture on my printer, I inserted the pic into a word document and copy and pasted my cousin’s signature at the bottom of the pic.  This, I felt, added an extra personal touch.  I saved my project and printed it out on iron on transfer paper (tip: always remember to read the instructions on how to print your image on the transfer paper).

Once I had the image ready, I got my iron, a pillowcase, and a piece of wood that’s big enough to lay your project down.  Lay your pillowcase down on the piece of wood, iron out any wrinkles so you can have a smooth surface, and do the same for the tote bag.  Position your transfer where you want it to be and iron away.  Give it time to cool and then peel away the backing of the paper.

Here’s my project completed:

I was so happy with this bag that I almost kept it, but I didn’t because I knew it would bring so much joy to my cousin.  I filled the bag with the rest of her Christmas presents and when she received it, she was so happy and couldn’t wait to use her new tote bag.

I hope this idea inspires you to make many different and personal projects either to keep or to give.  Until next time…