Easy DIY Wonder Woman Headband and Wrist Cuffs using Felt

Hello everybody!

I hope you guys are well.

Since Halloween is just around the corner here’s a quick DIY costume accessories idea for Wonder Woman.

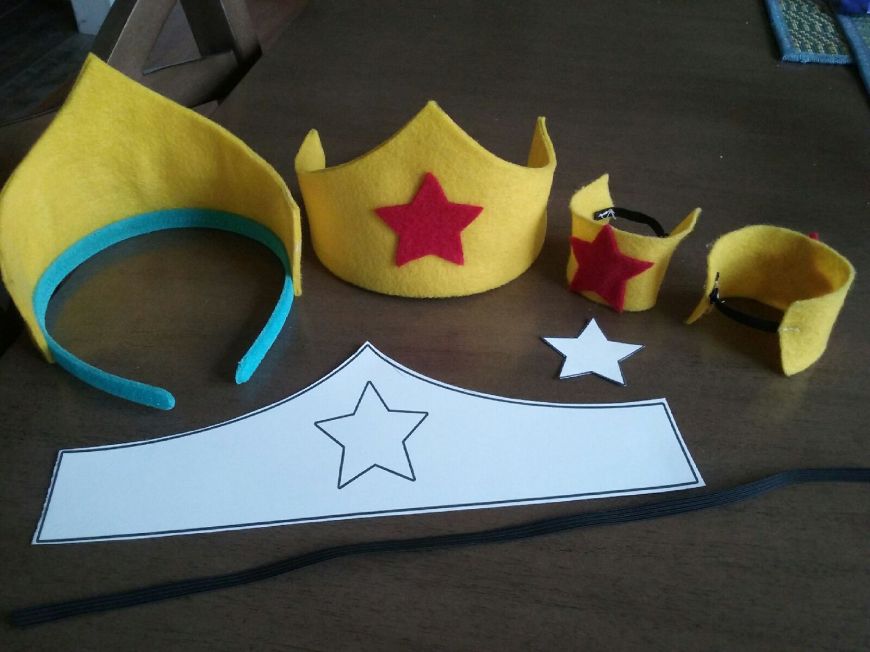
20161026_143526I made these headpieces and wrist cuffs for my daughters who wanted something simple to wear on Superhero day at their school. They wore a plain blue shirt and jeans so the accessories would pop out more.  They didn’t want to do the typical cape and mask thing so I found a good template online for Wonder Woman’s headband and got to work.

Using the template to get the design, I folded the felt in half to make it sturdier with two layers of felt as oppose to just a single layer.  I glued the headpiece at the edges with some tacky glue and then made the stars with a template and red felt.  I then glued the headpiece onto the plain headband.  The tacky glue doesn’t dry instantly so I used large paperclips to secure the felt onto the headband until it dried.  It worked like a charm.  For the wrist cuffs I simply cut out a long rectangular piece from the yellow felt and split it in half.  I then glued the stars in the middle and sewed on a small piece of elastic so they could slide it onto their wrist and have fun pretending to be Wonder Woman, which they did.  

I hope you like this idea!

Take good care all.

Until next time…

Crazy Hair Day

Hello everybody!

I hope you guys are well.

Last week we celebrated all things great of Dr. Seuss with book readings, poems, and special activities that included wearing a hat to school (crazy or favorite), Dr. Seuss colors (black, white, and red), pajamas, and our favorite, crazy hair.  Of course, my daughters were super excited, especially my young one because it was going to be her very first crazy hair day at school.

I wanted to do something special, but keep things simple at the same time.  This is what we came up with:

crazy hair day 2                crazy hair day 1

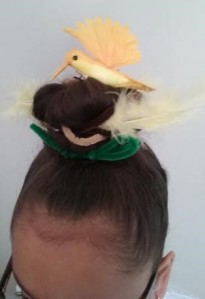
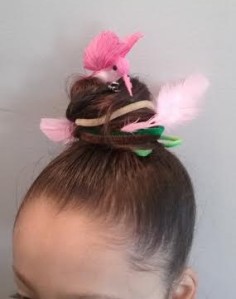
We decided to turn a hair bun into a birdie’s nest by taking brown, tan, and green pipe cleaners and twisting them around the bun so they could look like twigs and leaves.  Then we stuck several feathers in and last but definitely not least, the main attraction was these little paper birdies that we found at AC Moore craft store.  It was easy to attach the birds onto the bun because the birds already had a metal hair clip.

Of course, these buns can be decorated more and taken to another level, but like I said before, I wanted to keep things simple.  My girls were super happy with the results (mission accomplish!) and ready to participate in crazy hair day.

Take this idea and let your imagination and creativity fly!

Take good care all.

Until next time…

Happy Valentine’s Day!

Hello everybody!

I hope you guys are well.

Valentine’s Day is fast approaching and at my daughter’s school they did something pretty cool this year.  They wanted their students to decorate and bring in a valentine holder for their valentine cards and treats.

My kindergartener and I decided to decorate an empty graze snack box (graze.com) because it was already partially decorated for Valentine’s Day (red hearts) and it was the perfect size to transform into a purse/clutch valentine holder! 🙂

We just added my daughter’s name in the front (covering the graze name) along with some 3D valentine stickers
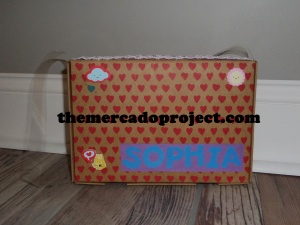
and glued a piece of purple construction paper in the back and decorated it with a variety of stickers.
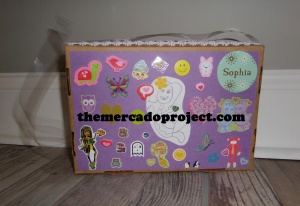
Back

I secured the box with a little bit of clear tape and made a slot, which we decorated with a fabric, flower ribbon, for the valentine cards and treats to go in.
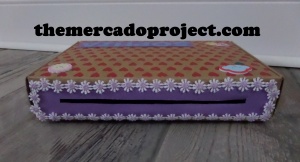
We recycled the clear plastic backing, which you can probably see in the first 2 pics, of the glitter tape decoration that we placed around the box (not shown in the pics) for the purse strap.  I then showed my daughter how she could hold the box two ways:  as a clutch with her hand or a shoulder purse with the strap.  The giddiness that ensued after transforming that box into her valentine holder will stay with me forever. 🙂

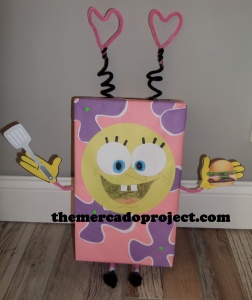
As for my third grader, she had a vision and it involved one of her favorite cartoon characters, SpongeBob Squarepants.  She loves that little dude!

She didn’t want to do plain, old SpongeBob though.  No, she wanted to make SpongeBob in his Kuddly Krab work uniform.   This uniform is featured in the episode titled “Bossy Boots.”

We printed out some pics of SpongeBob wearing the uniform so we could easily reference it.
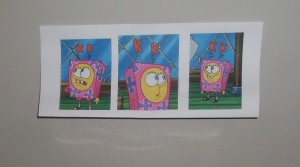
I also made a template of the purple flower design that’s on the uniform so my daughter could easily trace, cut, and glue the design onto the box.

The materials we used were a cereal box, construction paper (pink, yellow, purple, white, and neon green card stock paper), and pipe cleaners.  We also printed out a small spatula and a “Krabby Patty,” which we taped onto his hands.
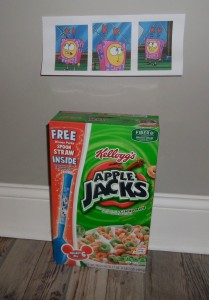
        

From a cereal box to “Kuddly Krab SpongeBob Squarepants!”
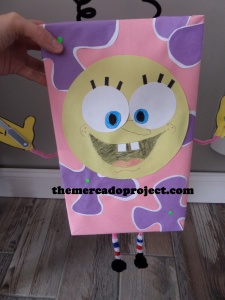
           

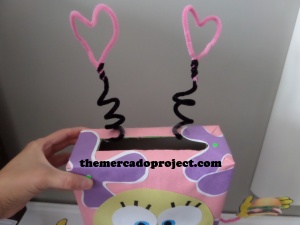
Here’s the breakdown: We gift wrapped the box with pink construction paper using tape and glue.  My daughter traced a big circle out of yellow construction paper for his face and two small circles for his eyes with white paper as well as two little squares for his front teeth.  She then drew the details herself.  She used the template for the purple flower designs and we glued those down as well as his face.  The pipe cleaners were used to make the antennas, arms, legs, socks, and shoes.  She wanted to place two pink hearts on the antennas instead of the red K’s.  For his yellow hands I copy and pasted a picture of SpongeBob and cropped the pic until his hands were the only things on the screen, then printed and glued onto the pipe cleaner.  We did the image two sided so it was easier to glue.  A slot at the top of the box ensures that valentine cards and treats will go in nicely!

There you have it!

HAPPY VALENTINE’S DAY EVERYONE!

Take good care all.

Until next time…
Coming to you from a new home in Pennsylvania!

Hi guys!

I hope you are all well and ready for the Christmas countdown!

I know, it’s been awhile.  So much has gone down and that’s the reason why I haven’t been posting.  We’re no longer living in Brooklyn, NY.  We made the big move to Pennsylvania on the 1st of November and so far things are well.  Slowly, but surely we’re settling into our new home.  My mind and heart hasn’t quite adjusted to the move, but I’m doing my best to sort of embrace the new location.  It’s definitely a better place for my girls to grow up in so I’m taking that into great account.  I just have to take things one day at a time!

In the meantime an idea  sprung up in my mind and I wanted to share it with you guys.  My girls are very fortunate to receive Christmas gifts from friends and family members who don’t live near us and I’m always telling them on Christmas day, “This is from so and so,” but I can always see their little faces trying to register who the person is and I don’t think they get it.  This year while I was making the labels for their presents that came in the mail I thought, “Maybe I can print out their pictures on the label.”  

Using Word and address labels, I printed the wording and the pictures separately because my program didn’t allow me to cut and paste the pic.  You can always print everything out on Word and simply tape it onto the gift, but I didn’t want to use tape.  I just improvised by cutting and using another label to assemble the words and pics together.  This is what I got and I love it:

CAM01494teext

These lovely people are my girls’ paternal grandfather and step-grandmother who live in New York, so this year when they open their gifts from them they’ll actually see who the gift is from. 🙂

I hope you enjoyed this idea.  More to come later on, hopefully.

Thanks for stopping by and may all your holidays be MERRY, SAFE, AND BRIGHT!

Take good care all.

Until next time…

Cucumbers and cookie cutters

Hello everybody!

I hope you guys are well.

I had a wonderful Mother’s day with my whole family.  I was gifted (by my husband) a, wait for it, SCOOTER!  Yup, an adult size scooter.  It’s pretty awesome.  I tested it out for a little while before heading out to my mom’s house.  I almost fell, but gained control and hopped back on it.  I can’t wait to scoot some more with my girls and my hubby.  It’s an unconventional gift, but it sure beats receiving a vacuum or blender.  🙂  I was also gifted a beautiful MOM necklace from http://www.lisaleonardonline.com/mama-necklace-P187C104.aspx. by my hubby and my girls.  All and all, I had a great day.

Changing subjects so the title of this post makes sense, I came across this pin on Pinterest.

7bd33945b81040edeb311c82a6df5a14

http://pinterest.com/pin/101753272802560641/

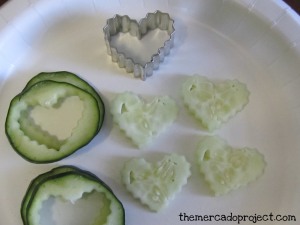
My daughter loves cucumbers and I have a small heart shape cookie cutter so of course after seeing this idea, I had to try it out!

IMG_4728text  IMG_4729text

As soon as I did it, I showed my daughter and she gasped at seeing the heart-shaped cucumbers.  The next day after school, she told me that her friends loved them as well and were asking her who made them, at which she proudly said, “my mom!”  Thank u to whoever came up with this idea.  I know it’s not rocket science, but it’s cute and it made my little girl happy and it’s those little things that count the most for me.

Take good care all.

Until next time…