Keep calm and bake!

Hello everybody!  I hope you guys are well.  Yesterday was my mother’s 61st birthday and it was fun spending time with her.  My daughter’s couldn’t wait to get to grandma’s house and I wanted to spend as much time as I could so we got up, ate breakfast, got ready and went early to her house.  I wanted to bake her a cake, but my dad insisted on buying it so my lazy booty agreed.

With enough time today, I decided to make the cake that I had been envisioning and I loved the end result.  Also I wanted to kick myself for not making this for my mom.   At least, I can make it for my dad who’s celebrating his 61st at the end of this month.

IMG_4078text

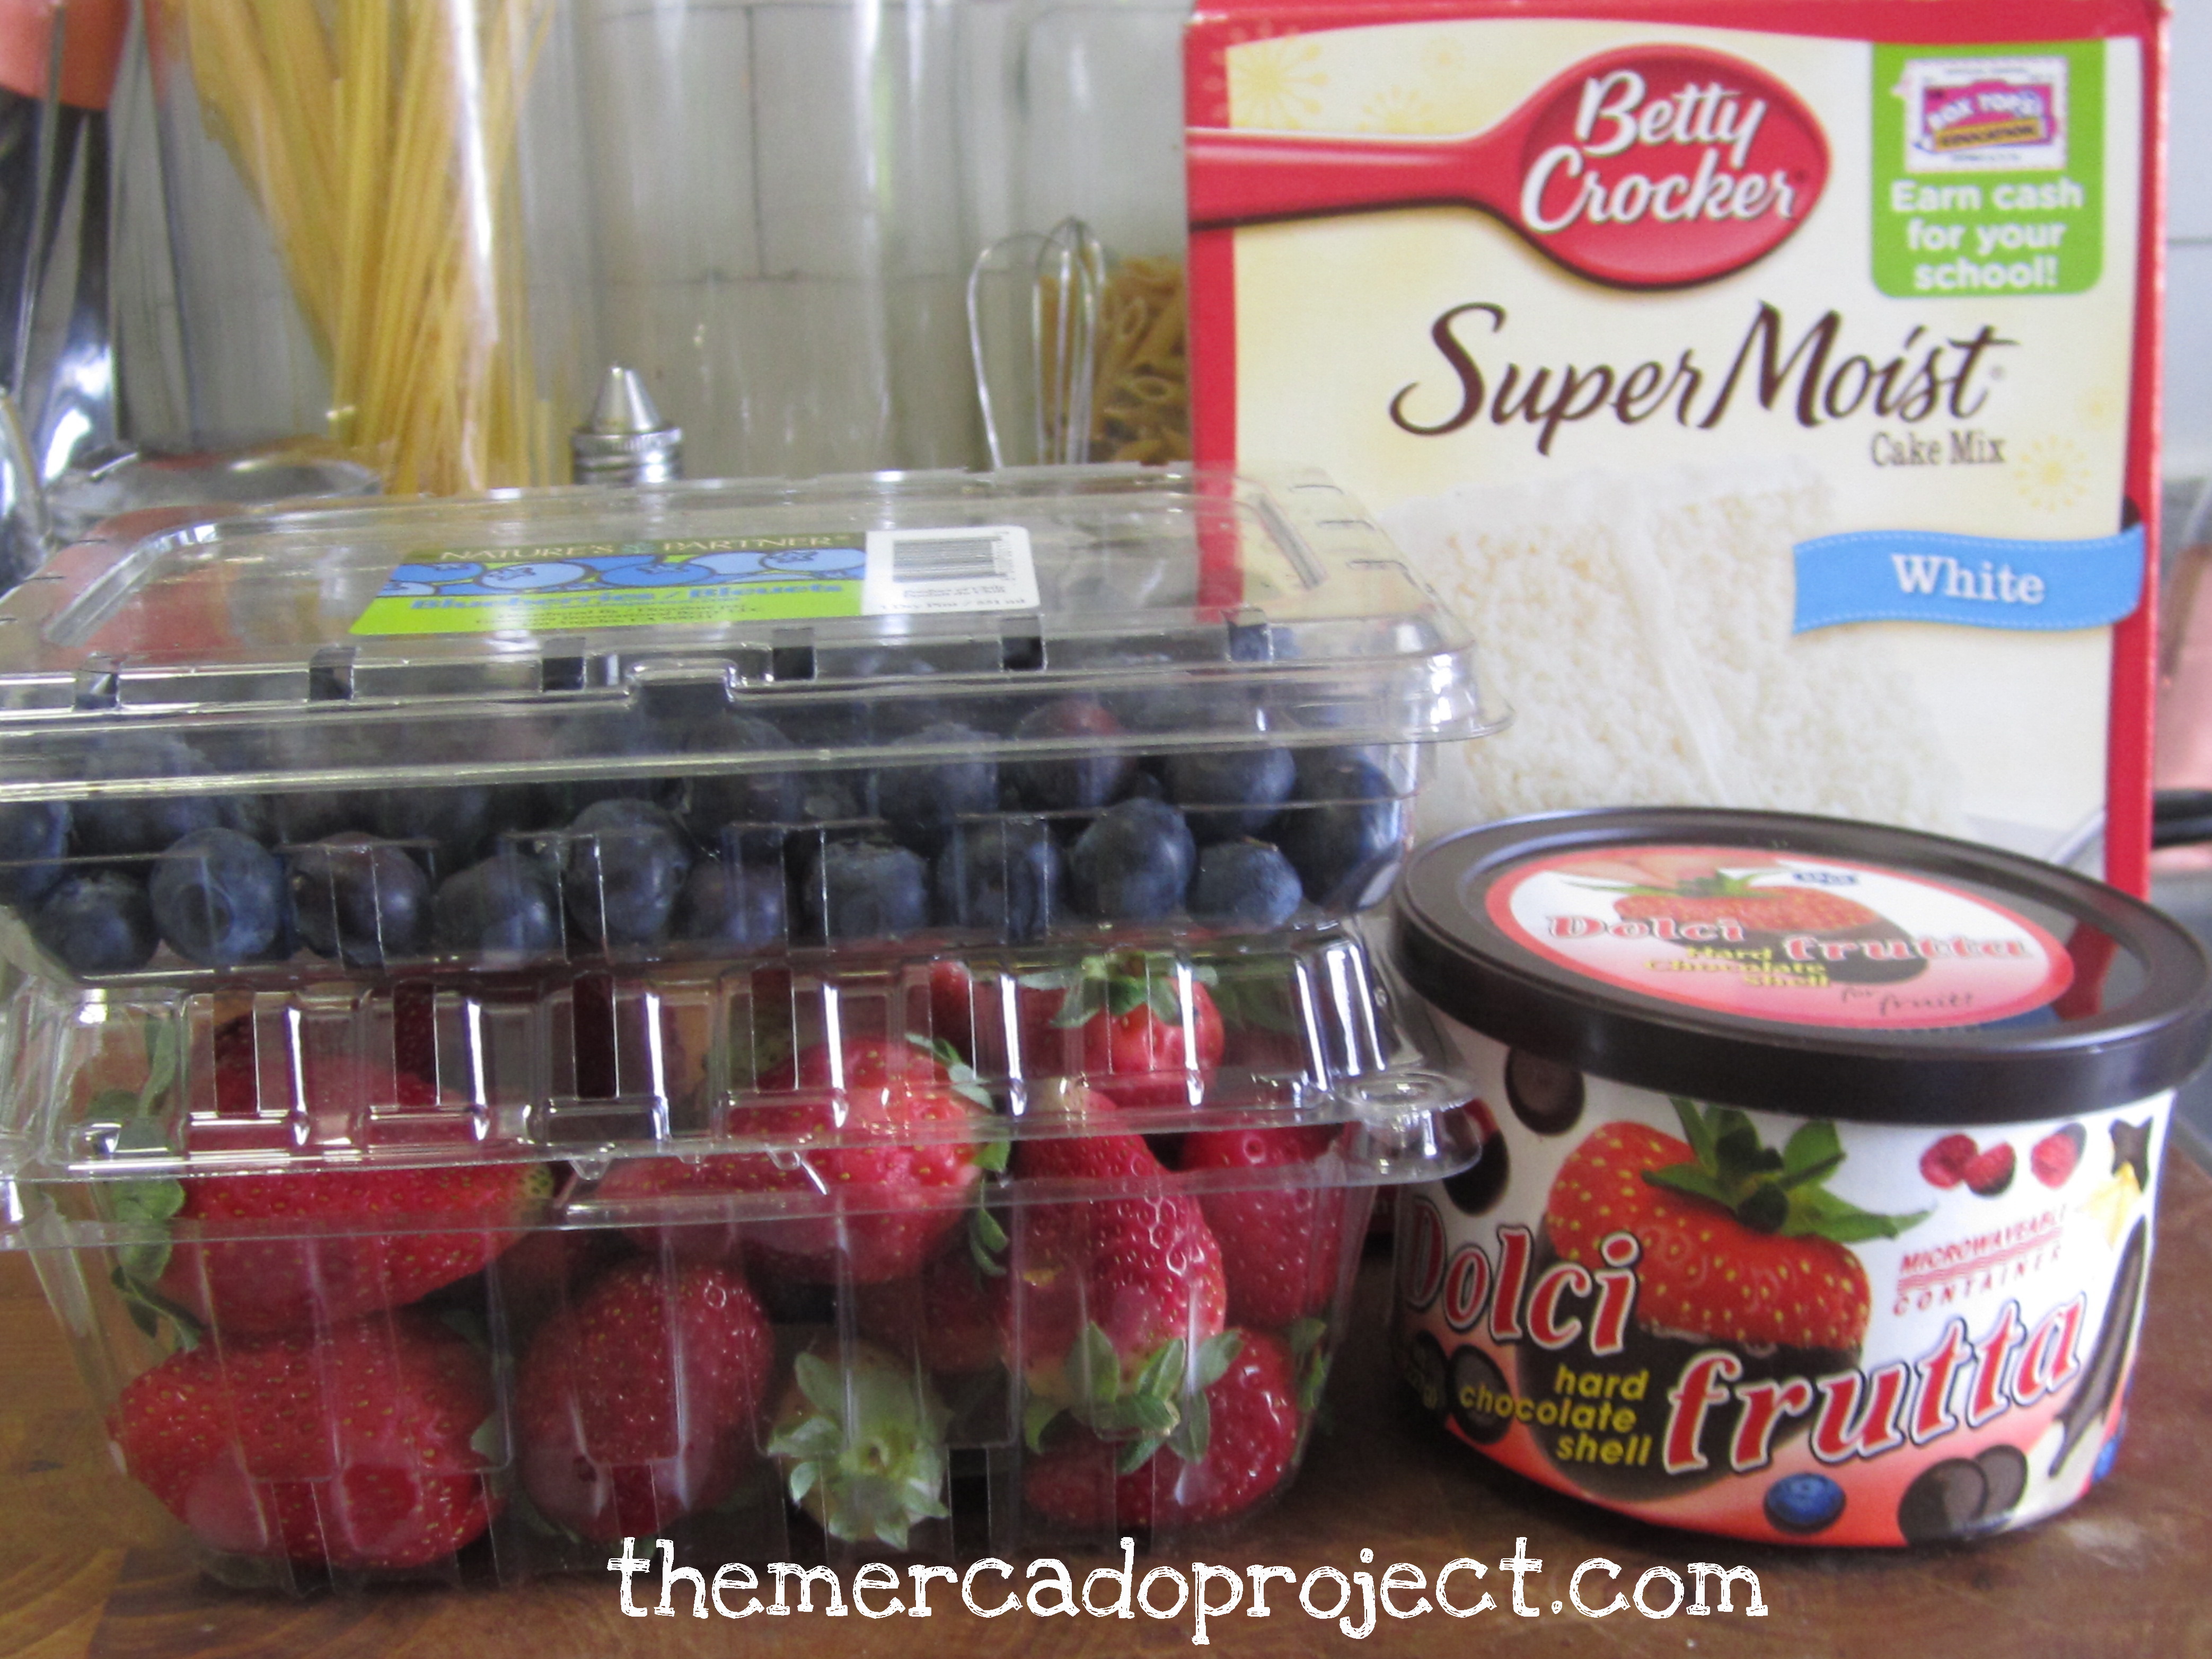
I love Betty Crocker’s Super Moist White cake mix and Dolci frutta hard chocolate shell, which you can easily melt in the microwave and it’s delicious.  I also used strawberries and blueberries.

IMG_4070text

Once the cake was cool enough, I sliced up the strawberries, then melted the chocolate and poured some in the middle of the cake on top and placed the blueberries there.  I drizzled some chocolate using the tip of a spoon and there you have it.  Cake + chocolate + fruits = Yummy!

IMG_4075text

I also made cupcakes and put this together for my daughter.  She couldn’t believe it was all hers!

I’m definitely going to make this for my dad’s birthday no matter how little time I have.  No if’s, ands, or buts about it.

Take good care all.

Until next time…

DIY Felt Gift Bow

Hello everybody!  I hope you guys are well.  I love wrapping gifts with unique wrapping paper that I either make myself, if the gift is small enough, or find at stores.  Recently, I wrapped up this gift for my god-daughter’s birthday.

IMG_3841text

I found this polka dot wrapping paper in the dollar section at Target in Harrisburg, PA awhile back.  My god-daughter loves Minnie Mouse so I found this clip art and glued it on top and then I found a Disney inspired font and printed out her name on an address label for her card.

She’s going to love it!

I also love gift bows and after finding that DIY magazine gift bow pin on Pinterest and attempting it with great results, I thought, “Let’s try using something else to make a bow.”  HELLO FELT!  

IMG_3928text

IMG_3929text

IMG_3930text

IMG_3932text

IMG_3933text

IMG_3934text

IMG_3935text

IMG_3936text

IMG_3941text

I’m definitely not a pro at sewing, but I do my best.  I love the final result of this bow and I used a long piece of thread so I could attach all the felt pieces together without having to cut and start again.  I only cut the thread for the last piece of felt, in which I sewed it separately and then tried to sew it on top of the bow without showing too much thread.  I wasn’t that successful, but that was my first attempt and I’m definitely making more of these bows so hopefully practice makes perfect.  I’m going to add a little bit of glue so it’ll stay on the gift, but hopefully still come off intact.  The gift above is my husband’s Valentine’s Day gift 🙂 wrapped up in another gorgeous print found at Target’s dollar section.  I can’t wait to show you what I got him.  It’s too freaking cute!  I also can’t wait to do more of these gift bows in different felt colors and designs.  Happy gift wrapping and bow making!

Take good care all.

Until next time…

DIY Valentine Cards

Hello everybody!  I hope you guys are well.  I love sending mail to my family and friends.  It’s almost Valentine’s Day and I’m going to be sending out valentines along with a couple of pictures of my daughters to them all.  I could always go to Target and buy a set of valentines, but where’s the fun in that?  Here’s what I came up with this year for my own Valentine cards:

IMG_3926text

Using Microsoft Word, I made a quick design with a heart and our well wishes for Valentine’s Day.

I made four to a page and printed it out on white cardstock.

IMG_3919text

Then using Anita’s All Purpose Acrylic Craft Paint in True Red and a little bit of water mixed in, I painted the hearts and let it dry.  Then I outlined the hearts with studio g Glitter Glue (I couldn’t find the name of the color but it’s sort of yellow/gold).

IMG_3922text

I cut out the cards using my trusty cricut paper-cutter.  It makes things so much easier and neater.

IMG_3924text

Here are my valentines!  Ready to be accompanied by a picture and shipped off to my loved ones.

IMG_3925text

IMG_3917text

This craft project was quick and I can’t wait to ship them out.

Take good care all.

Until next time…

DIY VALENTINE DECORATIONS

Hello everybody!  I hope you guys are well.  I love decorating for Valentine’s Day especially for my girls.  They love seeing all the hearts and pastel colors sprucing up our home.

IMG_3896text

Using my heart puncher, I like taping hearts in various places like my china cabinet, the TV unit, the door, etc.  My daughters always seem to find all the little decorations I put up.  It’s like a game for them and I love seeing their smiles when they discover hearts here and there.

I love decorating with banners and I made these two last year using felt and my heart puncher.

IMG_3886text

I purchased purple, hot pink, light, pink, and glitter red felt in order to do my banners.

IMG_3878text

IMG_3882text

I cut out the triangles (freehand) and then sewed them together right at the corner.  For the heart banner, the glitter red felt was a bit thicker and I was able to punch out hearts and string them together.

IMG_3884text

I put the pennant banner outside my doorway with this cute little guy declaring his love for you!

IMG_3891text

I decorated my picture shelf in my living room with the heart banner.  I want to make a couple more and overlap them, but I ran out of the glitter red felt so it’s off to the craft store.  Yippee!

Take good care all.

Until next time…

Chicken Pot Pie Cupcakes/Muffins

Hello everybody!  I hope you guys are well.  We had a long, lazy weekend that was spent resting and recovering from being sick.  It was great to snuggle up in my bed and watch some TV while my daughters played in the living room and my husband watched them.  Oh, did I mention that he also cooked our meals as well?  My husband is a great man and father (I know, my gushing is too much and you’re probably fake heaving, but I need to give my man a BIG SHOUT OUT).  He’s absolutely wonderful and a superb chef!  That’s why I wasn’t surprised when he was able to recreate a recipe pin that only had pictures with the ingredients.  I came across this pin (www.pinterest.com) right before my husband was going to the supermarket.  I showed it to him and he took a mental note of the ingredients and off he went.

493777546614500409_fuyPH8fP_c

With the exception of the cheese from the above pin, my husband made these mini chicken pot pies.

IMG_3815text

They looked amazing and tasted so good.  You should all give it a try if you like pot pies.

My husband simply cooked the chicken, then mixed it with the cream of chicken soup and vegetables, turned the oven on to 375 degrees, placed the biscuits into the cupcake pan, poured mixture in and on top of the biscuits, and baked for 20 minutes.  Enjoy!

Take good care.

Until next time…

DIY CHOCOLATE LOLLIPOPS

Hello everybody! I hope you guys are well.  I am pretty well-known in my family to do chocolate lollipops with the help of candy molds.  I have a “small” collection of candy molds and I used to make them a lot for family and friends before I had kids.  Now, I make them once and awhile.  I decided to surprise my daughter with an after dinner treat.  Check out my process, it’s pretty simple:

PART_1358216518181text

From my collection, I chose a heart-shaped lollipop mold with the word Love scripted in the middle, vanilla chocolate candy wafers, and a small bowl to melt the chocolate in.

IMG_20130114_174147text

I melt my chocolate in the microwave.  Make sure you don’t put it on high or the chocolate will burn.

PART_1358216706197text

With a small spoon, pour the chocolate into the mold.

IMG_20130114_174523text

Pick up your mold and tap it against the counter until your chocolate spreads out evenly.

IMG_20130114_174747text

You can add lollipop sticks or not.

IMG_20130114_185217text

Put the candy mold in your freezer for about 10 to 15 minutes.

IMG_20130114_185228text

Enjoy!

You can buy candy wafers in different colors.  I’m going to get them in red and using this candy mold make some lollipops for Valentine’s Day.

My sister and I are currently looking for a theme for our brother’s 30th birthday party.  We’re leaning towards a mustache party and while browsing through Pinterest, of course, I came across this:

222928250275072890_QIwecq5f_c

Isn’t that awesome?  I’m definitely going to be on the lookout for this candy mold, just in case.

Take care all.

Until next time…

DIY IRON ON TRANSFER T-SHIRT

Hello everybody!  I hope you guys are well.  My heart is still quite heavy regarding the tragedy that occurred in Newtown, Connecticut.  I’m a mother of a kindergartener.  I don’t know what I would do.  I do wish everyone love, support, patience, and peace.

I wanted to share with you something that I’ve done as a gift for my father for years now.  The other day he wore a shirt that I had personalized for him using iron on transfer paper and fabric markers.  I made that shirt a looooong time ago and I was so surprised to see that he still had it and that it still looked great.  My mom mentioned to me that he loves wearing the shirts that I make for him, especially the ones with his grand-daughter’s pictures.  She said, “those are his favorite because he gets to show everyone his grandkids!”  Love it!

Here’s my process:

IMG_3608text

I purchased my iron on transfers and t-shirt at A.C. Moore.  The shirt was on sale for $2.99 and with a store coupon, I was able to get the transfers for half off.

IMG_3635text

Choose and print out your picture.  For this particular brand, I had to print my image as a REVERSE IMAGE.

IMG_3641text

You’ll need an iron and I use this piece of wood, specifically for my t-shirts so I just store it away when I’m done, along with a pillowcase.  I place the pillowcase on top of the wood so I can have a hard but smooth surface.  I always do the transfers on the floor so I can press down on the iron.

IMG_3642text

Cut out your design or image and place it on your t-shirt right side up so you can see exactly how it’s going to look.

IMG_3644text

Flip over the paper and center it once again.  I usually like to place the image one finger long down from the neck.

IMG_3646text

PrintWorks instructions: “Iron transfer with firm pressure in a straight, non-stop motion top to bottom and side to side.  Keep iron moving at all times to prevent scorching.”  Make sure your corners are ironed down.

IMG_3648text

Let your t-shirt cool off completely (this part is hard for me because I’m so impatient).  Then carefully peel away the transfer’s backing.

IMG_3652text

I LOVE IT and I hope my dad loves it too.

I hope you guys enjoy this gift and crafting idea.

Take good care.

Until next time…

Storing Picture Perfect Jigsaw Puzzles

Hello everybody!  I hope you guys are well.  My daughters love jigsaw puzzles and they have a lot of them, but I don’t have enough room for all the boxes.  Here’s my solution:

I put each individual puzzle into a Ziploc bag (sandwich size) and cut out the picture of the completed puzzle that’s usually on the front of the box and tape it onto the front of the bag.  I then take a picture of all the puzzles together, print on regular copier paper and tape onto the front of a big box that’s going to store them.


This puzzle set has small pictures of the completed puzzle on the back of the storage box, but I wanted to place a bigger picture of the puzzles on the front of the lid so I took a picture, added their names, printed it out and taped it on the lid.  Now my daughters can see it clearly.  Thanks for looking and I hope you like this idea.

Stay alert, stay alive.

Until next time…

DIY Thanksgiving banner

Hello everybody!  I hope you guys are well.  Here’s a DIY Thanksgiving banner that I came up with.

I used Microsoft Word, a leaf template, cardstock, a wide Thanksgiving print ribbon, and paper clips to make my banner.

A simple, but meaningful banner.

I affixed the leaves onto the ribbon using the paper clips and the ribbon is held by blue painter’s tape, which I love to use because it holds things up and doesn’t damage surfaces.  I hope you like this idea.

Stay alert, stay alive.

Until next time…

DIY: MEET OUR TURKEY

Hello everybody!  I hope you guys are well.  Remember our Halloween door monster.  If you don’t, then here’s a reminder:

I wanted to continue this door decoration idea right into Thanksgiving so our adorable monster has had a major transformation.

Meet Gobble Gobble Mercado!

I think I love him more than my daughters do.  Oh well, he’s simply adorable and I had a blast doing this.  I kept the eyes from the monster and printed out the hat, beak and feet.  I used party streamer paper and found two red strings for the wattle.  I hope this turkey brought a smile to your face.

Stay alert, stay alive.

Until next time…